

Overview
When specific events happen in Stripe (for example, payment, subscription, or customer events), this integration will:- Receive the webhook event from Stripe.
- Verify the webhook signature.
- Process the event data.
- Trigger the corresponding Novu notification workflow.
You can also clone this repository: https://github.com/novuhq/stripe-to-novu-webhooks
Prerequisites
Before proceeding, ensure you have:- A Stripe account (Sign up here).
- A Novu account (Sign up here).
1
2
3
Expose Your Local Server
To test webhooks locally, you need to expose your local server to the internet.There are two common options:- localtunnel
- ngrok
localtunnel is a simple and free way to expose your local server without requiring an account.
-
Start a localtunnel listener
-
Copy and save the generated public URL (for example,
https://your-localtunnel-url.loca.lt).
localtunnel links may expire quickly and sometimes face reliability issues.
4
Set Up Stripe Webhook Endpoint
Stripe supports two endpoint types: Account and Connect. Create an endpoint for Account unless you’ve created a Connect application. You can register up to 16 webhook endpoints on each Stripe account.When you create an endpoint in the Dashboard, you can choose between your Account’s API version or the latest API version. You can test other API versions in Workbench using stripe webhook_endpoints create, but you must create a webhook endpoint using the API to use other API versions in production.
- Navigate to the Webhooks page.
- Click Add Endpoint.
-
Add your webhook endpoint’s HTTPS URL in Endpoint URL.
- If you have a Stripe Connect account, enter a description, then click Listen to events on Connected accounts.
- Select the event types you’re currently receiving in your local webhook endpoint in Select events.
- Click Add endpoint.
5
Add Signing Secret to Environment Variables
- Copy the Signing Secret from Stripe’s Webhook Endpoint Settings.
- Add it to your
.env.localfile:
6
Keep the webhook route public
Stripe signs webhook requests itself. Do not put/api/webhooks/stripe behind session authentication.If your app uses Clerk middleware and you protect routes by default, exclude the webhook path:7
Create the Stripe webhook endpoint in Next.js
Createapp/api/webhooks/stripe/route.ts:app
api
8
Add Novu Workflow Notification Trigger Function
Createapp/utils/novu.ts :app
utils
api
9
Add or create Novu workflows in your Novu dashboard
In Novu, a Stripe webhook event can trigger one or more workflows, depending on how you want to handle those events.A workflow defines a sequence of actions (for example, sending email or in-app notifications) that run when triggered.The Novu dashboard lets you create a custom workflow from scratch or start from a template.Follow these steps to set up your workflow(s) in the Novu dashboard:Identify the Triggering Event(s)
Determine which Stripe webhook events will activate your workflow (for example,customer.subscription.created).Your route maps each Stripe event type to a Novu workflow identifier by replacing dots with dashes, so customer.subscription.created becomes customer-subscription-created. Create matching workflow IDs in Novu.Supported webhook events
Supported webhook events
To find a list of all the events Stripe supports and learn more about them, visit the Stripe documentation.
Payload structure
Payload structure
Stripe wraps each event as
{ id, type, data: { object } }. Your route uses event.data.object as the Novu payload and loads the customer from event.data.object.customer.See the full shape in the Stripe event types docs. A shortened customer.subscription.created object looks like:Choose Your Starting Point
- Use a Workflow Template
- Create a Blank Workflow
- Code-First Workflow (Novu Framework)
Browse the workflow template store in the Novu dashboard. If a template matches your use case (for example, a billing or subscription notice), select it and customize it.
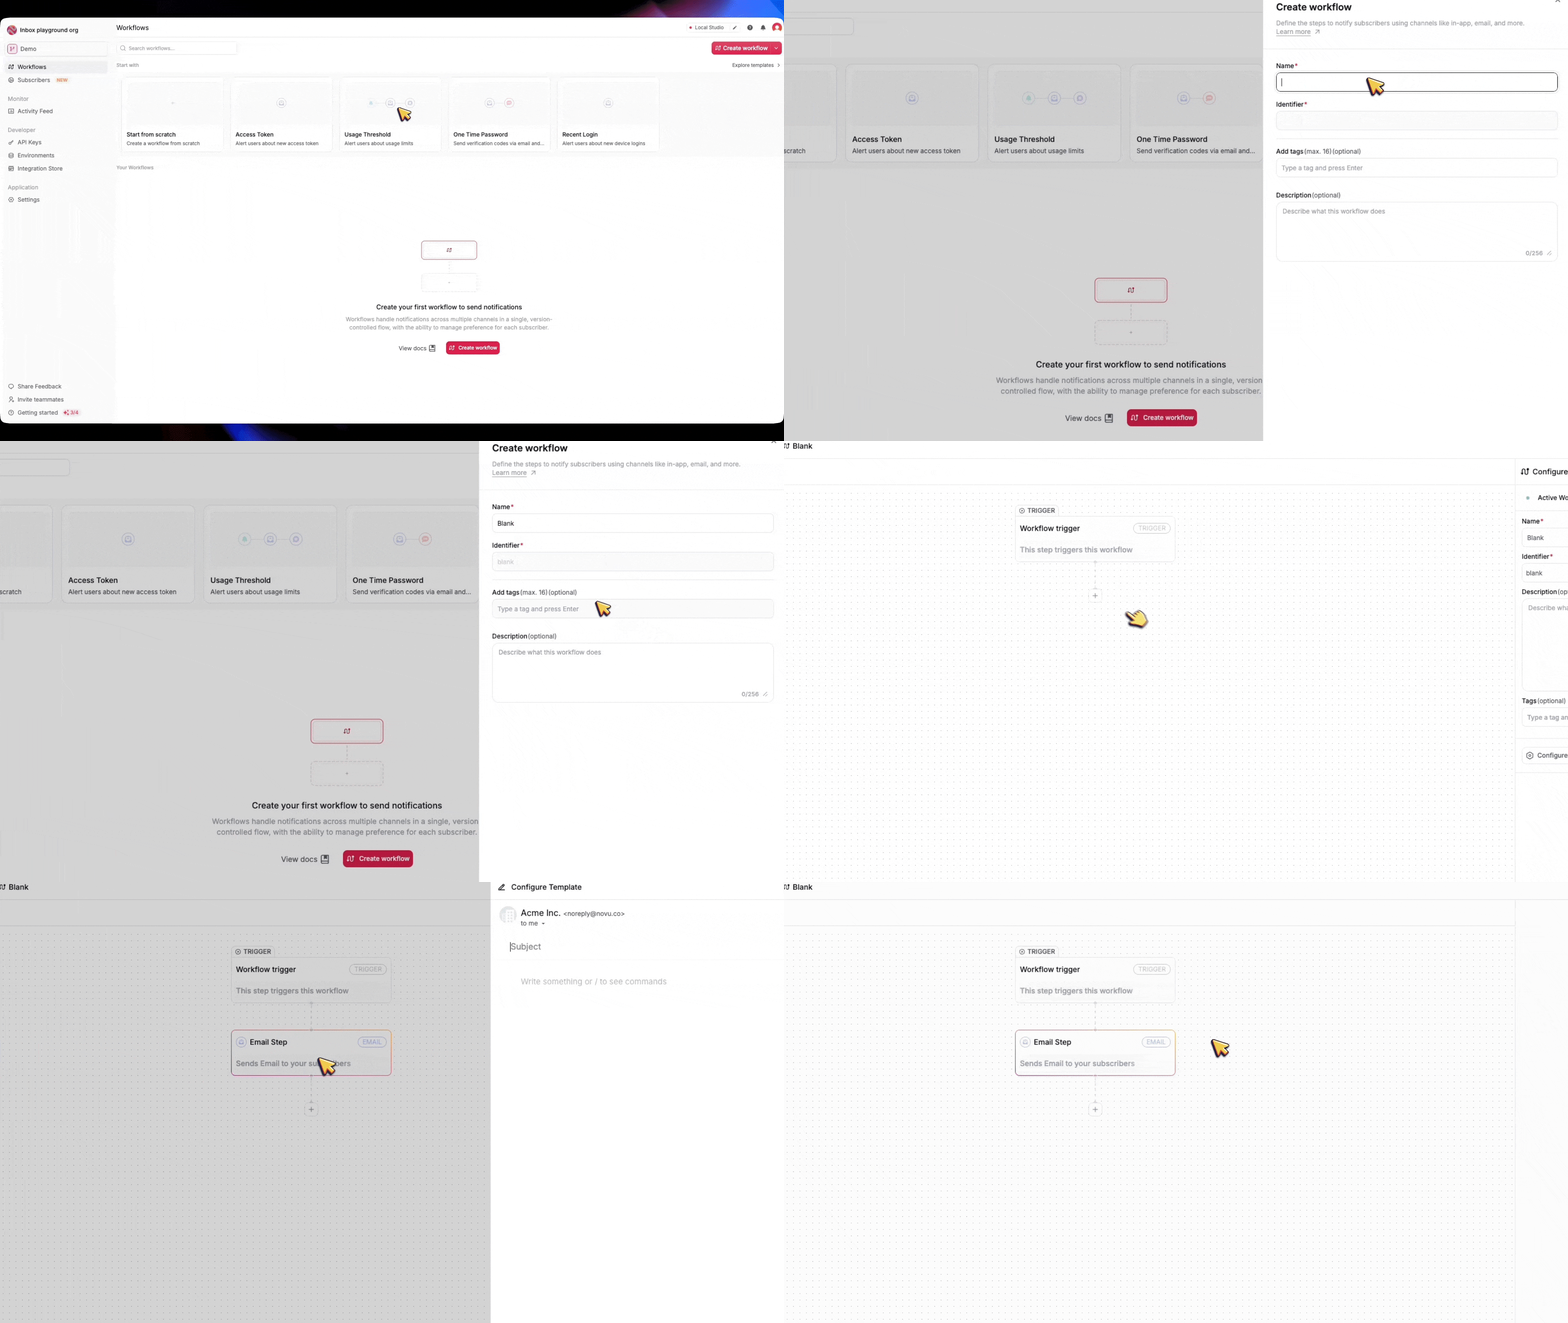
Configure the Workflow
- For a template, tweak the existing steps to align with your requirements.
- For a blank workflow, add actions like sending emails, sending in-app notifications, Push notifications, or other actions.
- For a code-first workflow, you can use the Novu Framework to build your workflow right within your code base.
Set Trigger Conditions
- Link the workflow to the correct webhook event(s).
-
Ensure the Novu workflow identifier matches the mapped Stripe event type (for example,
customer-subscription-created).
10
Disable Email Delivery by Stripe
By default, Stripe sends email notifications whenever necessary, such as subscription created, updated, and more.To prevent users from receiving duplicate emails, we need to disable email delivery by Stripe for the notifications handled by Novu.- In your Stripe Dashboard, navigate to the Settings.
- Under the Product Settings section, navigate to the Billing tab.
- Toggle off delivery of the events you want to handle with Novu.
11
Test the Webhook
Stripe CLI
Learn how you can test the webhook events using the Stripe CLI.