You can create a custom step using Novu Framework. For more information, refer to the Custom steps.
Channel steps
Channel steps deliver notifications to users through supported communication channels. Each channel step includes its own template editor for defining notification content and channel-specific behavior. Supported channel types include:In-App
Push
SMS
Chat
Novu provides built-in demo integrations for the Email and SMS channels. These sandboxed providers let you test workflows before configuring a provider.
Action steps
Action steps introduce logic and flow control into a workflow. They do not send notifications directly, but instead affect when and how downstream steps execute. Action steps are typically placed before or between channel steps to shape delivery behavior.Delay
The Delay step pauses workflow execution for a specified duration before continuing to the next step. Delay is used when timing matters, whether you need to wait a fixed amount of time, resume execution at a scheduled moment, or defer execution based on data from the trigger payload. This is useful for use cases such as:- Waiting for X amount of time before sending the message.
- Waiting for a short period before sending a push message in case the user has seen the notification in the Inbox component.
- Sending a reminder email 24 hours after a user abandons their shopping cart to encourage checkout completion.
- Sending a follow-up message 3 days after user registration to check if they need onboarding assistance.
- Execution pauses for the configured duration or until the scheduled time.
- Once the delay condition is satisfied, the workflow continues to the next step.
- All downstream steps execute normally unless blocked by conditions or other controls.
To learn how to configure delay types and scheduling behavior, refer to the Configure Delay Step documentation.
Digest
The Digest step controls how often downstream steps execute by batching multiple workflow trigger events into a single execution. Instead of running the workflow once per event, Digest collects events over time, groups them per subscriber, and then allows the workflow to continue once per digest window. Use Digest to- Prevent over-notifying users during bursts of activity
- Replace many similar notifications with a single summary
- Batch repeated events that occur within a short period
- Deliver notifications on a fixed cadence (for example, daily or weekly summaries)
- Workflow trigger events are collected instead of immediately flowing downstream.
- Events are grouped per subscriber (and optional grouping key).
- Once the digest window completes, the workflow continues once, with the aggregated events available as context.

Configure Digest step
Learn how to configure Digest windows, group rules, and schedule behavior.
Use digest data
Learn how to use the result from a Digest step to personalize content in the channel step editor.
Throttle
The Throttle step lets you limit the number of workflow executions within a specified time window. You can configure throttling directly in Novu workflow editor. By setting limits, you can prevent subscribers from receiving duplicate or excessive notifications when a trigger fires repeatedly.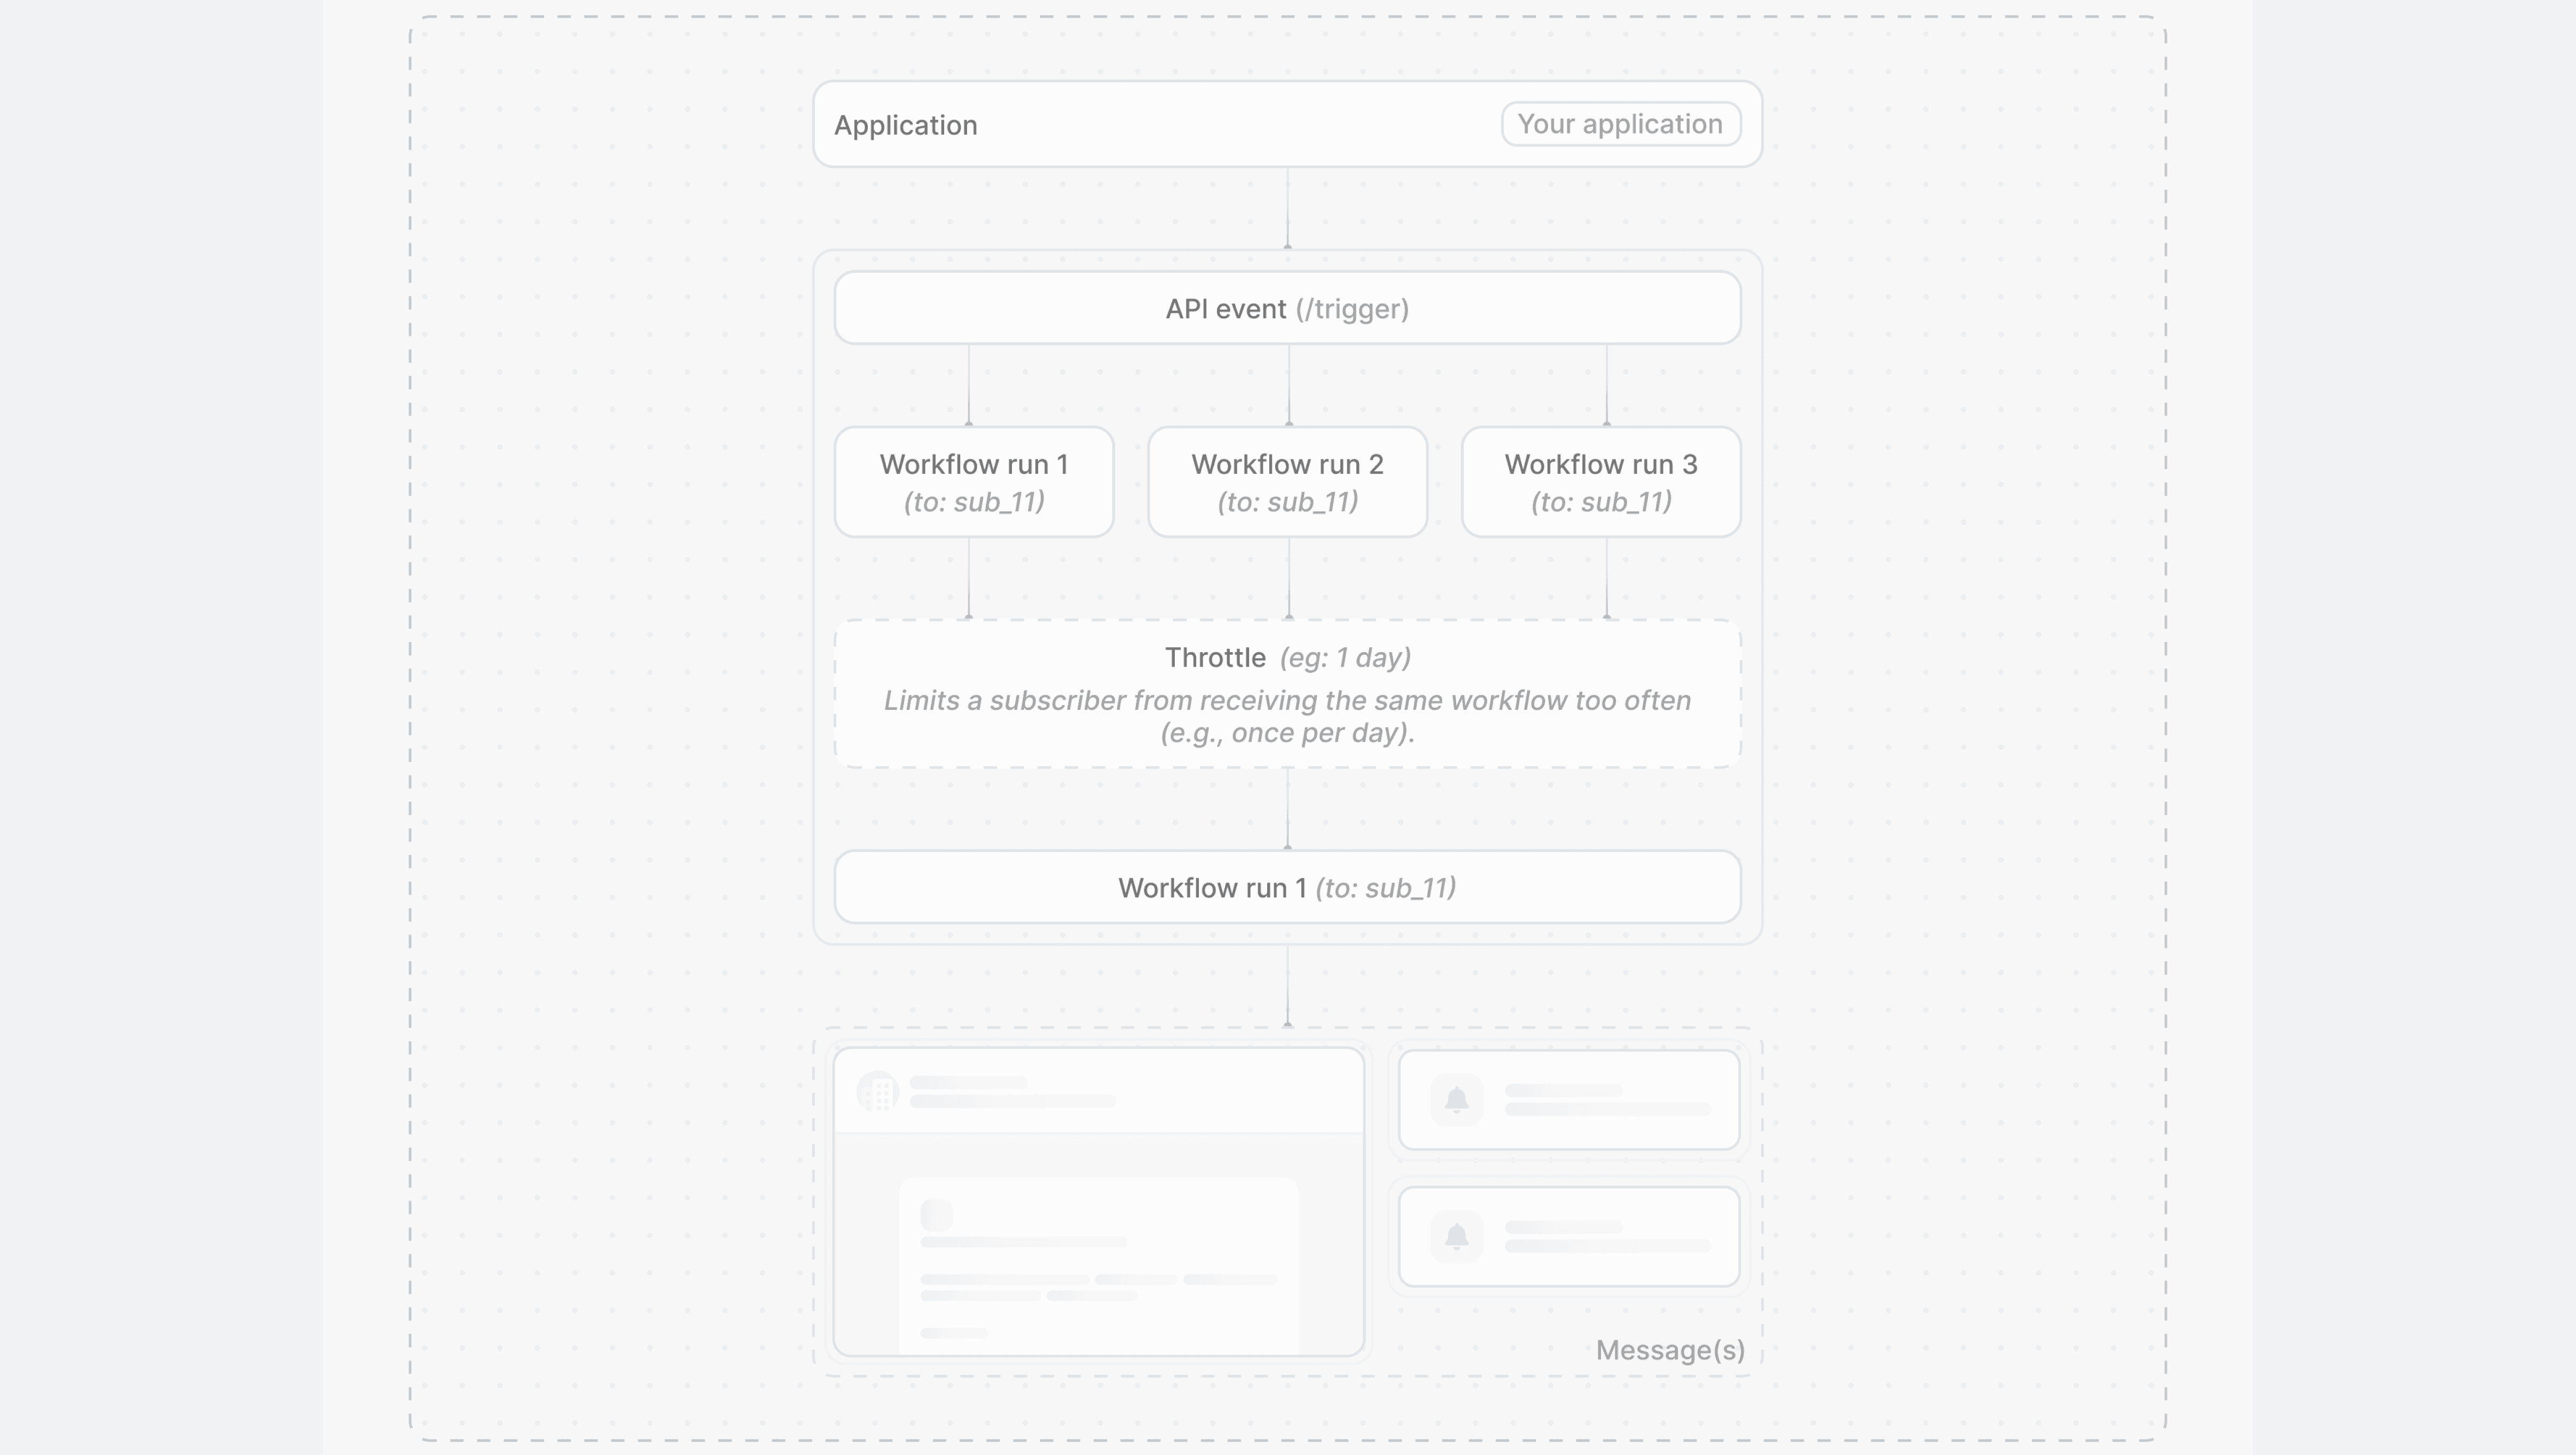
- Limiting high-frequency alerts (such as CPU or billing usage checks) to one notification per hour, day, or week.
- Preventing duplicate messages from automated cron jobs or recurring triggers.
- Controlling notification frequency for subscribers who belong to multiple projects or contexts.
- If the count is within the defined execution threshold for the time window, then the workflow proceeds as normal.
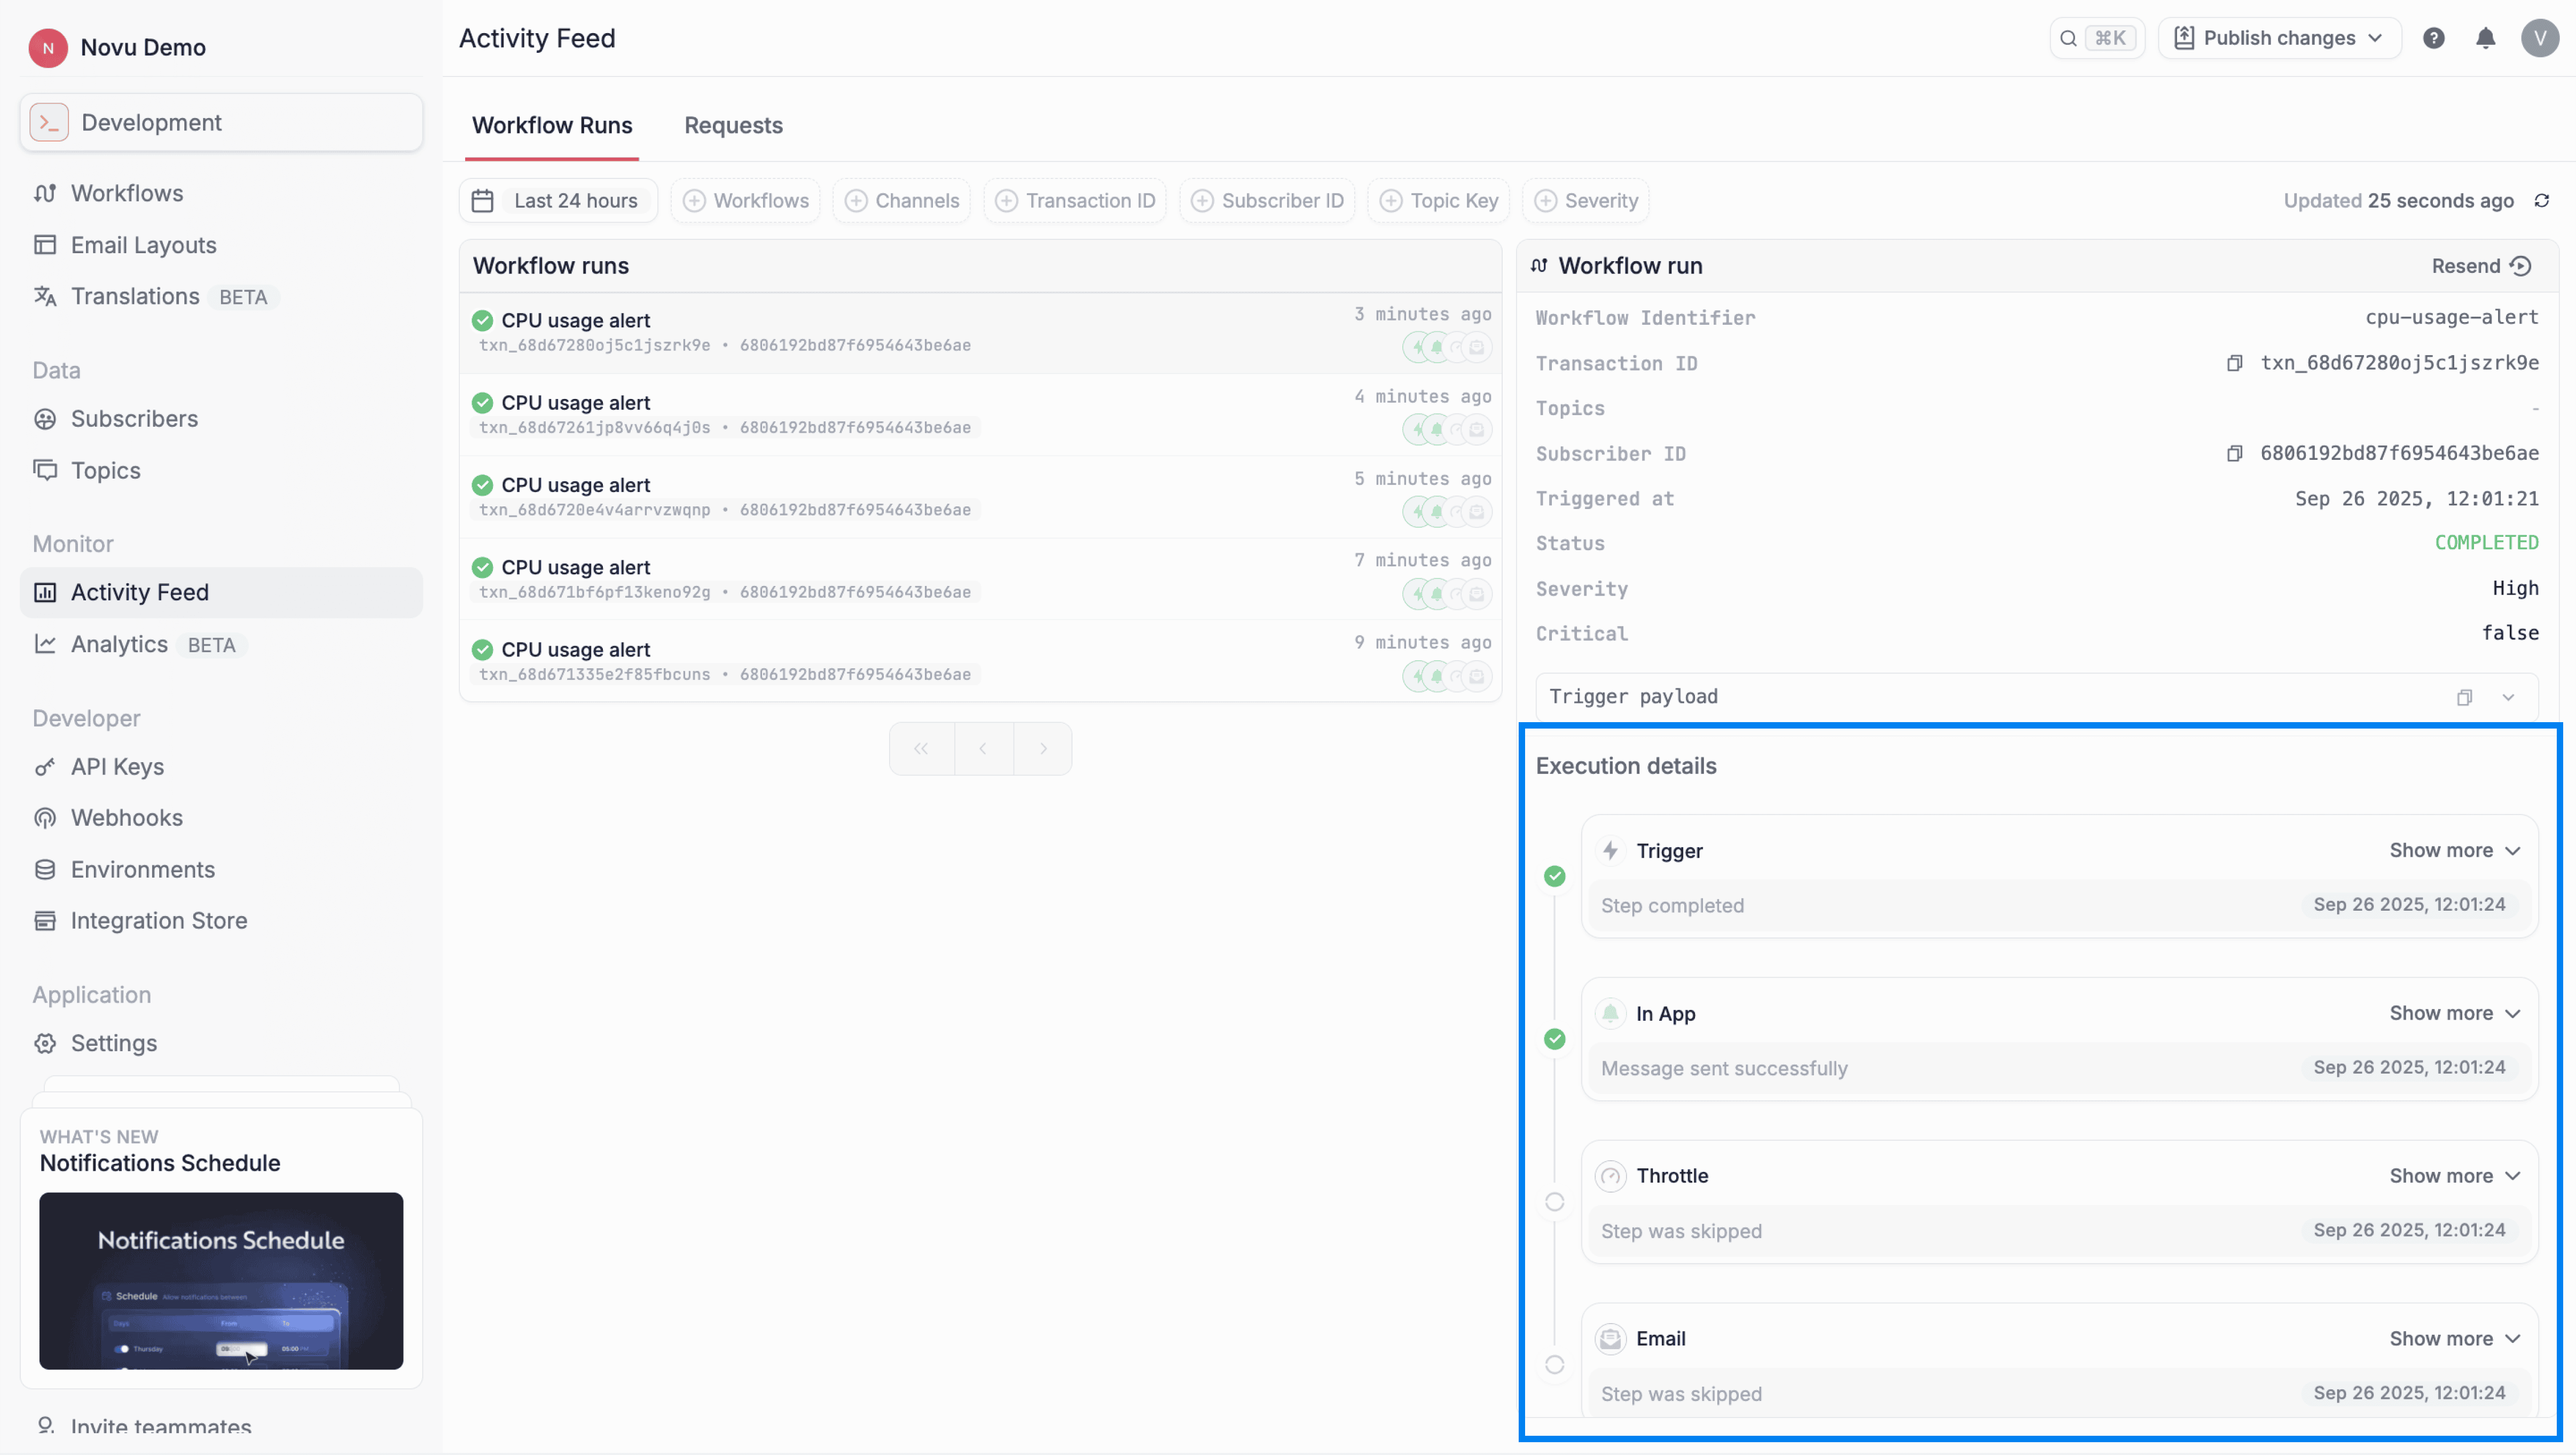
- If the count exceeds the threshold, then the workflow execution is halted at the throttle step. Any steps placed after the throttle step in your workflow will not be run. For example, if you have an email step following a throttle step, then that email will not be sent once the limit is reached.
To learn how to configure throttle windows, thresholds, and grouping behavior, refer to the Configure Throttle Step documentation.
HTTP
The HTTP step allows workflows to call external APIs during execution. It provides a native way to interact with systems outside of Novu directly from your workflows without relying on external webhooks or custom infrastructure. This is useful for use cases such as:- Fetching additional user or event data from your internal databases to enrich notifications.
- Determining if a user has an active premium subscription before sending a specific promotional email.
- Pinging an internal delivery system or observability tool with workflow context.
- The workflow pauses momentarily to execute the configured HTTP request (e.g.,
GET,POST,PUT). - Contextual data like subscriber information or previous step results can be injected into the request URL, headers, or body using LiquidJS.
- Once the API responds, the response data is stored as a step result.
- Downstream steps and conditions can consume the stored response data to personalize content or branch workflow execution.
To learn how to configure the request, test endpoints, and consume API responses, refer to the Configure HTTP Step documentation.
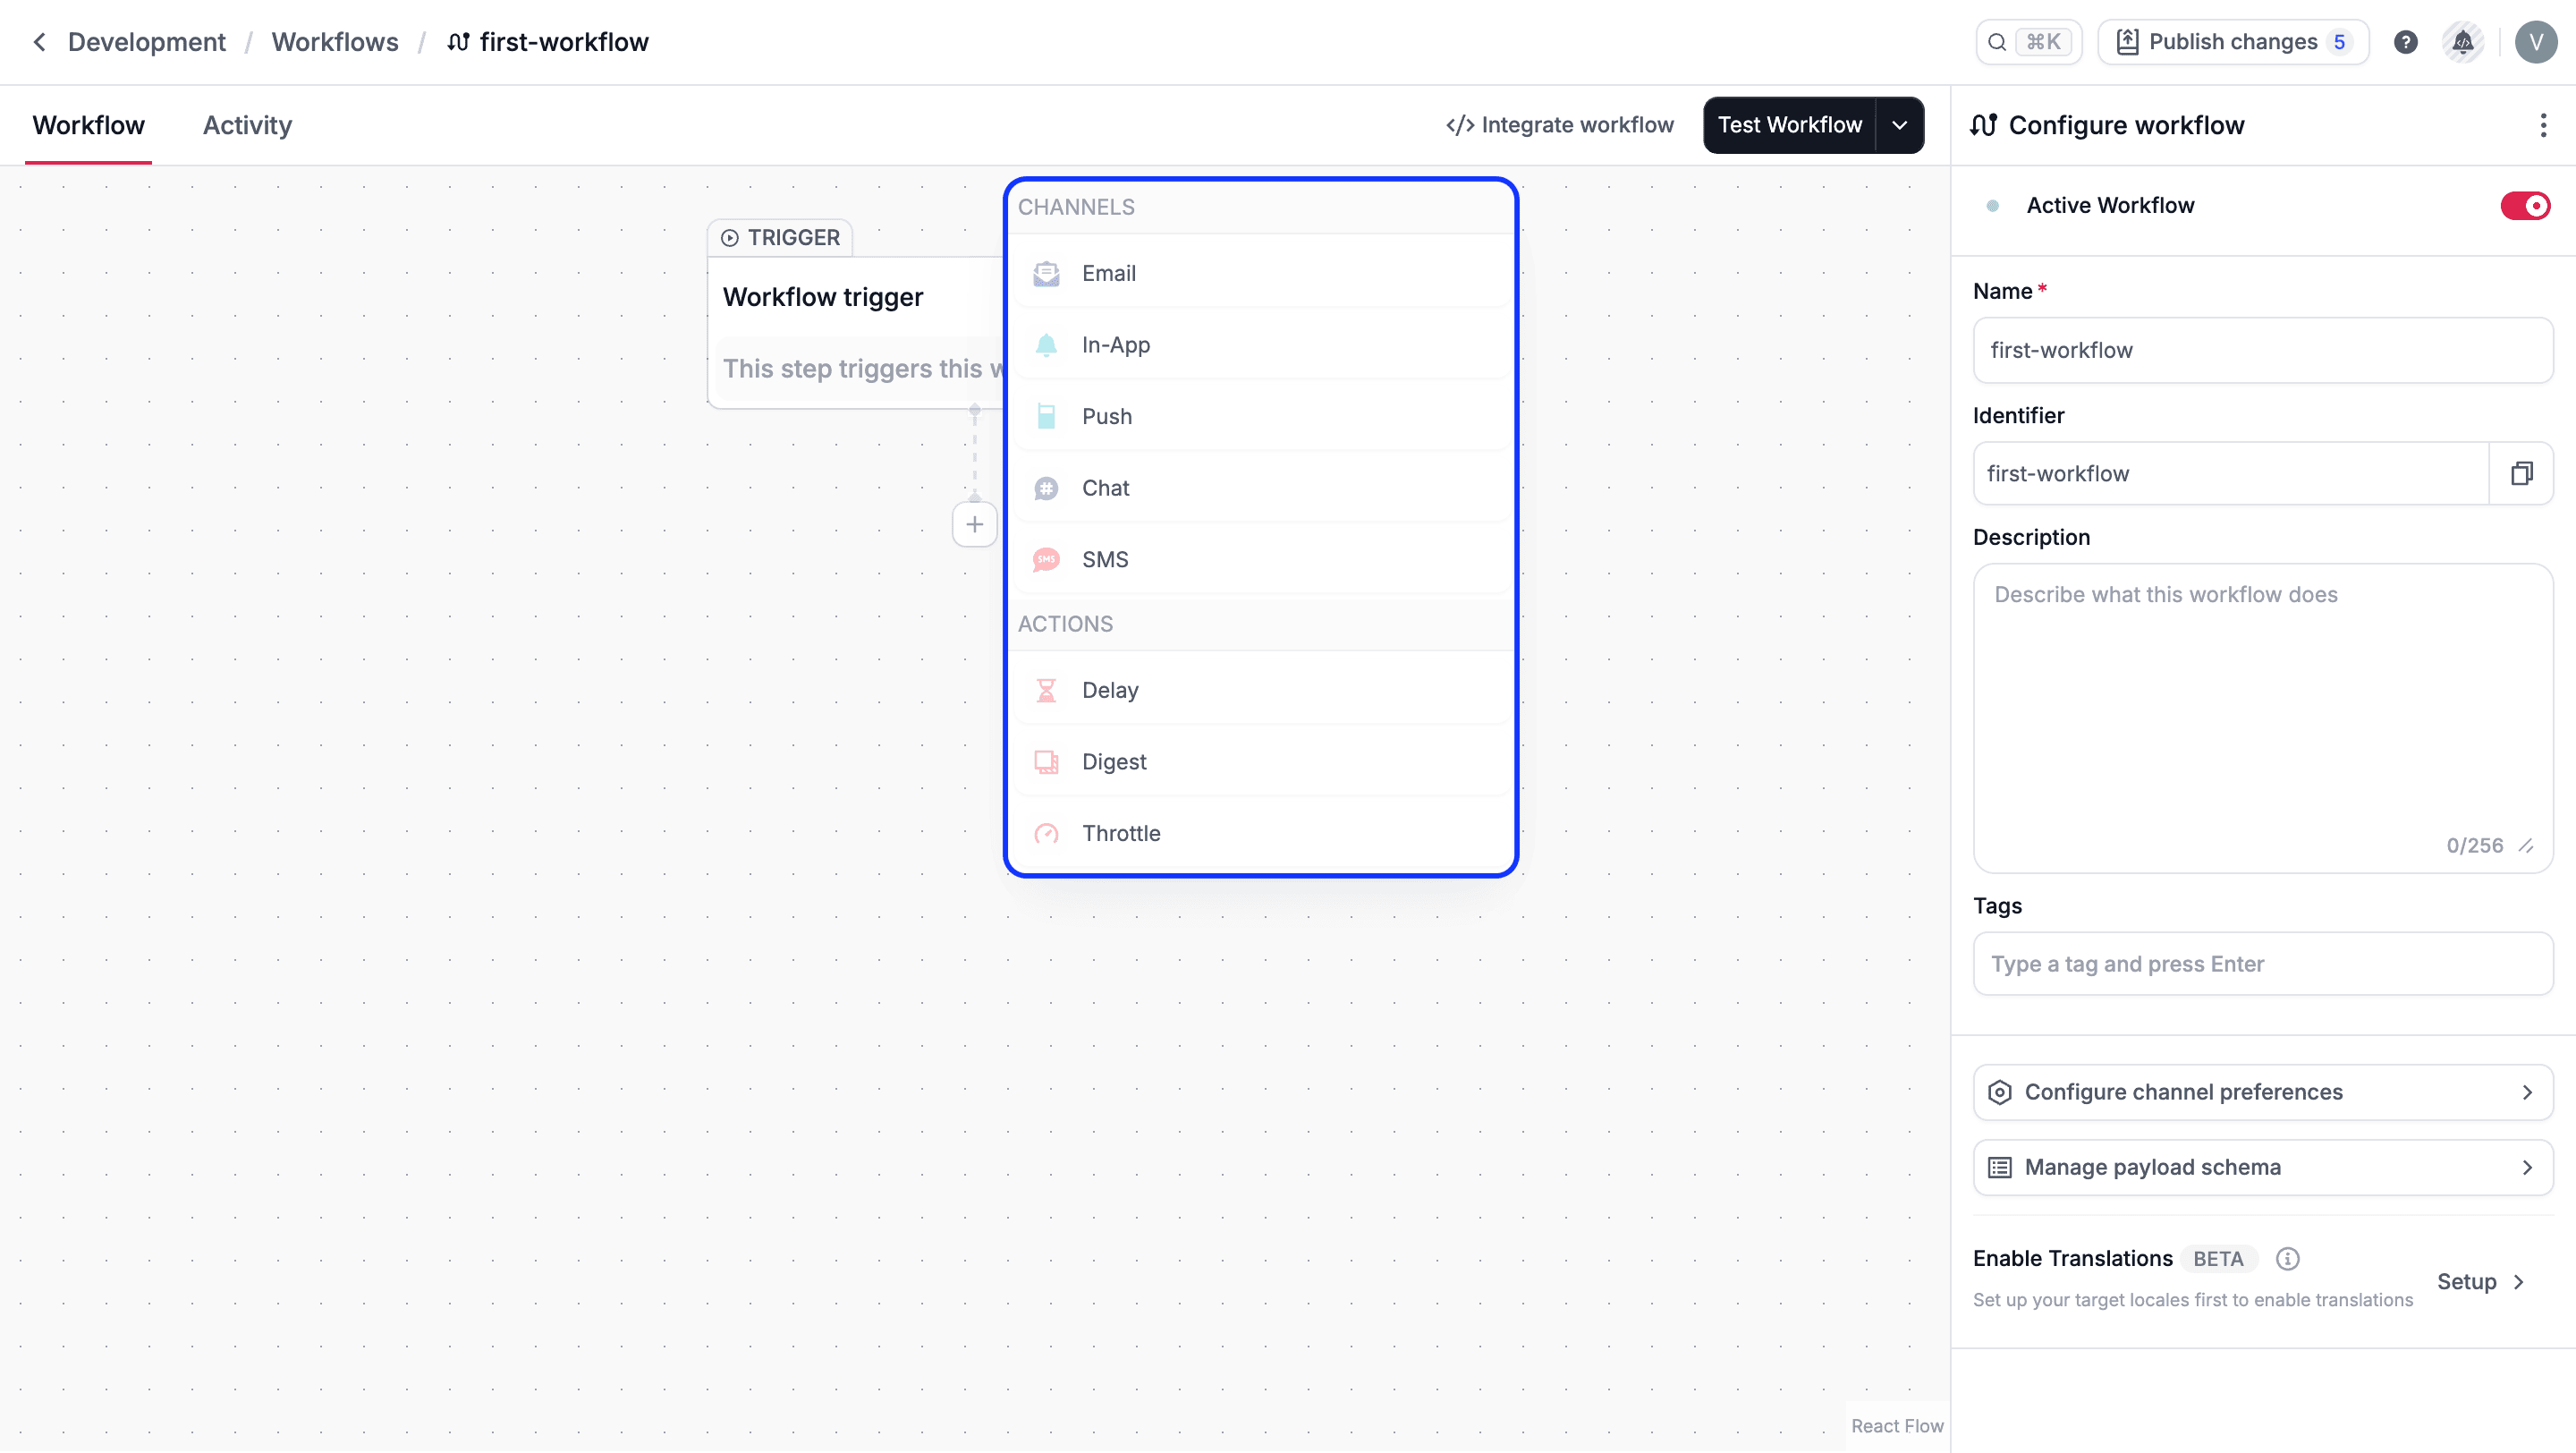
Add a step to a workflow
You add steps from the Workflow Editor when building or editing a workflow. The first step in every workflow is the Workflow Trigger, which represents the event that starts the workflow. To add steps:- Open a workflow in the Workflow Editor.
- Click the + (Add step) icon at the desired position.
- Select a step type from the available options.
- Configure the step if required.
How steps execute
When a workflow is triggered:- Steps execute sequentially, from top to bottom.
- Each step receives the same workflow payload.
- A step must complete before the next step begins.
- Send an in-App message.
- Wait 24 hours (Delay).
- If the in-app message is unread, send an email.
- If the subscriber is a premium user, then follow up with an SMS message.