<Inbox /> lets subscribers control when they want to receive notifications from email, SMS, and push channels.
By defining their hours of availability from the <Inbox /> UI, subscribers can automatically skip notifications outside of their chosen time range.
If you don’t need the Schedule feature, you can hide it from the Inbox component UI using the appearance prop. To learn more, refer to the documentation on styling the Inbox UI elements.
In-app notifications and notifications from critical workflows are never paused and will always be delivered, regardless of schedule settings.
How scheduling works
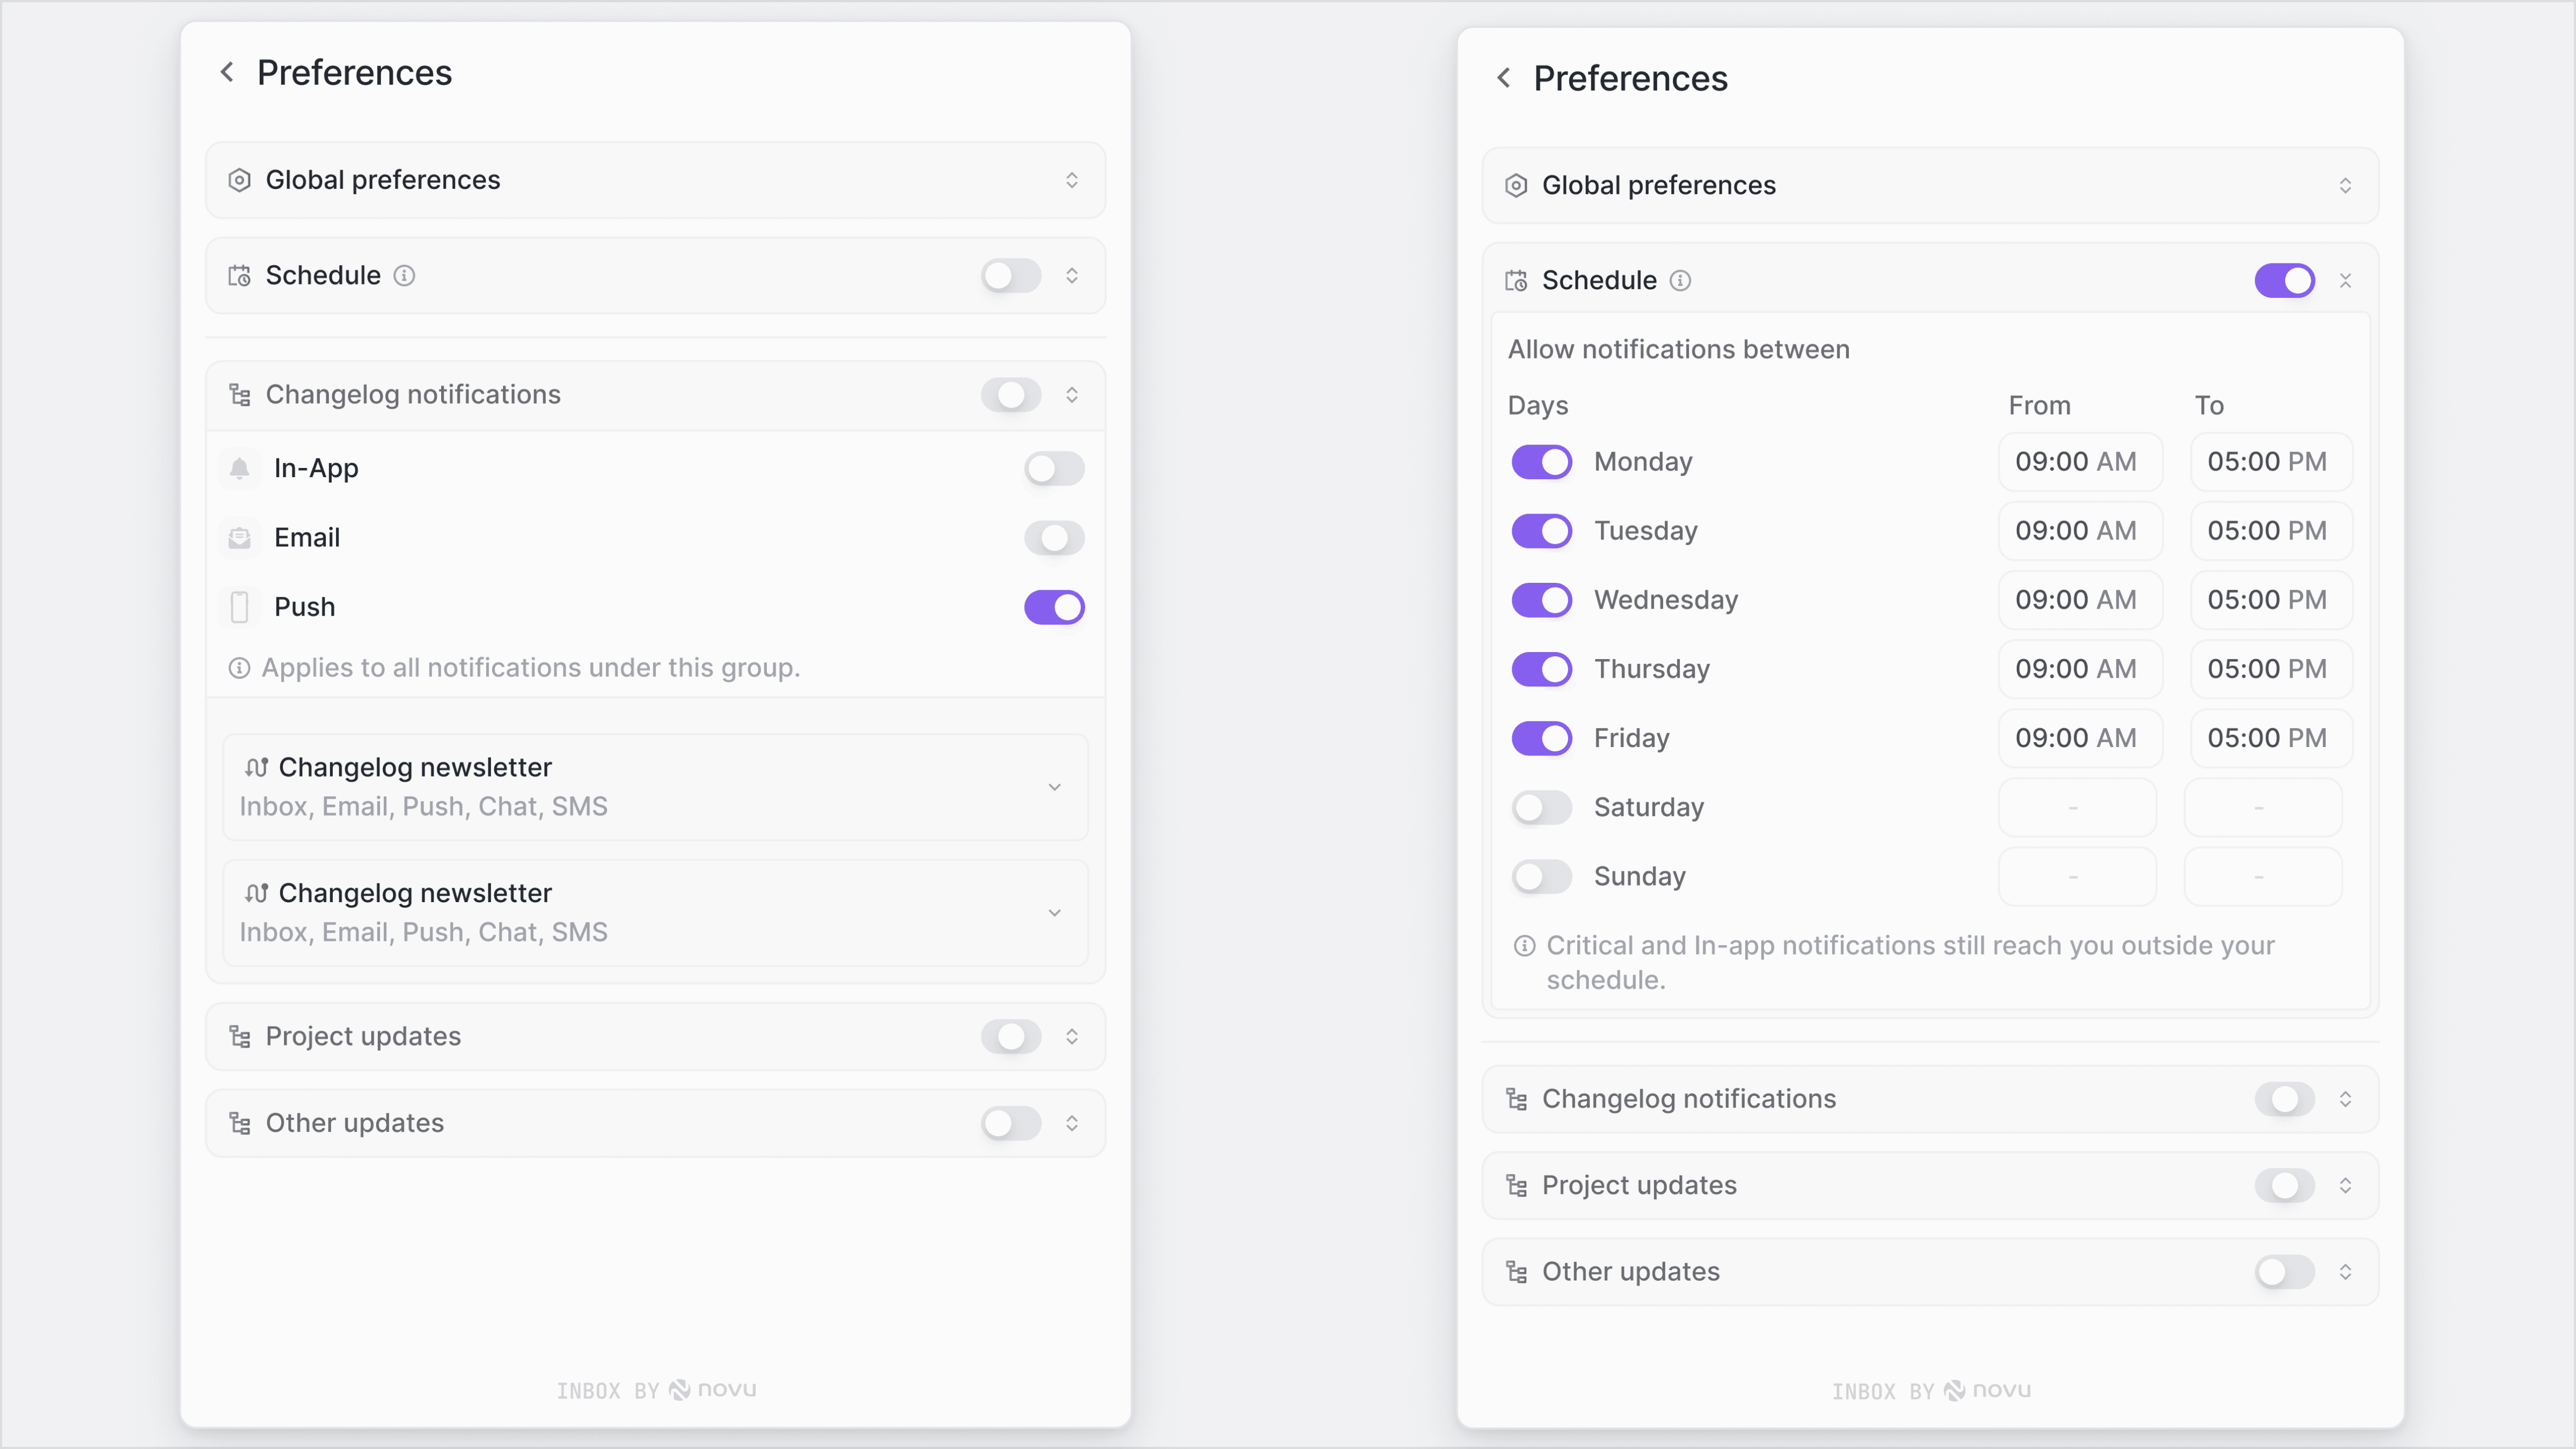
The schedule functionality is based on a clear set of rules controlled by the subscriber within the<Inbox />. When a subscriber enables their schedule, they can then manage their availability for each day of the week.
Daily availability
For any day that the main schedule is active, there will be two possible states:- Day is enabled: If a day is toggled on, then the subscriber must set a time range. Notifications will only be delivered within these hours.
- Day is disabled: If a day is toggled off, then the subscriber will not receive any non-critical notifications for that entire day.
Automatic timezone handling
The schedule operates in the subscriber’s local timezone, detected automatically from their system settings. There is no need for manual configuration. For example, if a subscriber in Warsaw sets their schedule from 9:00 AM to 5:00 PM, they will receive notifications during those hours in Central European Time (CET).Manage Schedule
The schedule UI in the preferences section is designed to be intuitive, giving subscribers several tools to quickly configure their availability. You can access Schedule from the Preferences section of the<Inbox /> UI. By default, scheduling is turned off, and all notifications will be delivered normally.
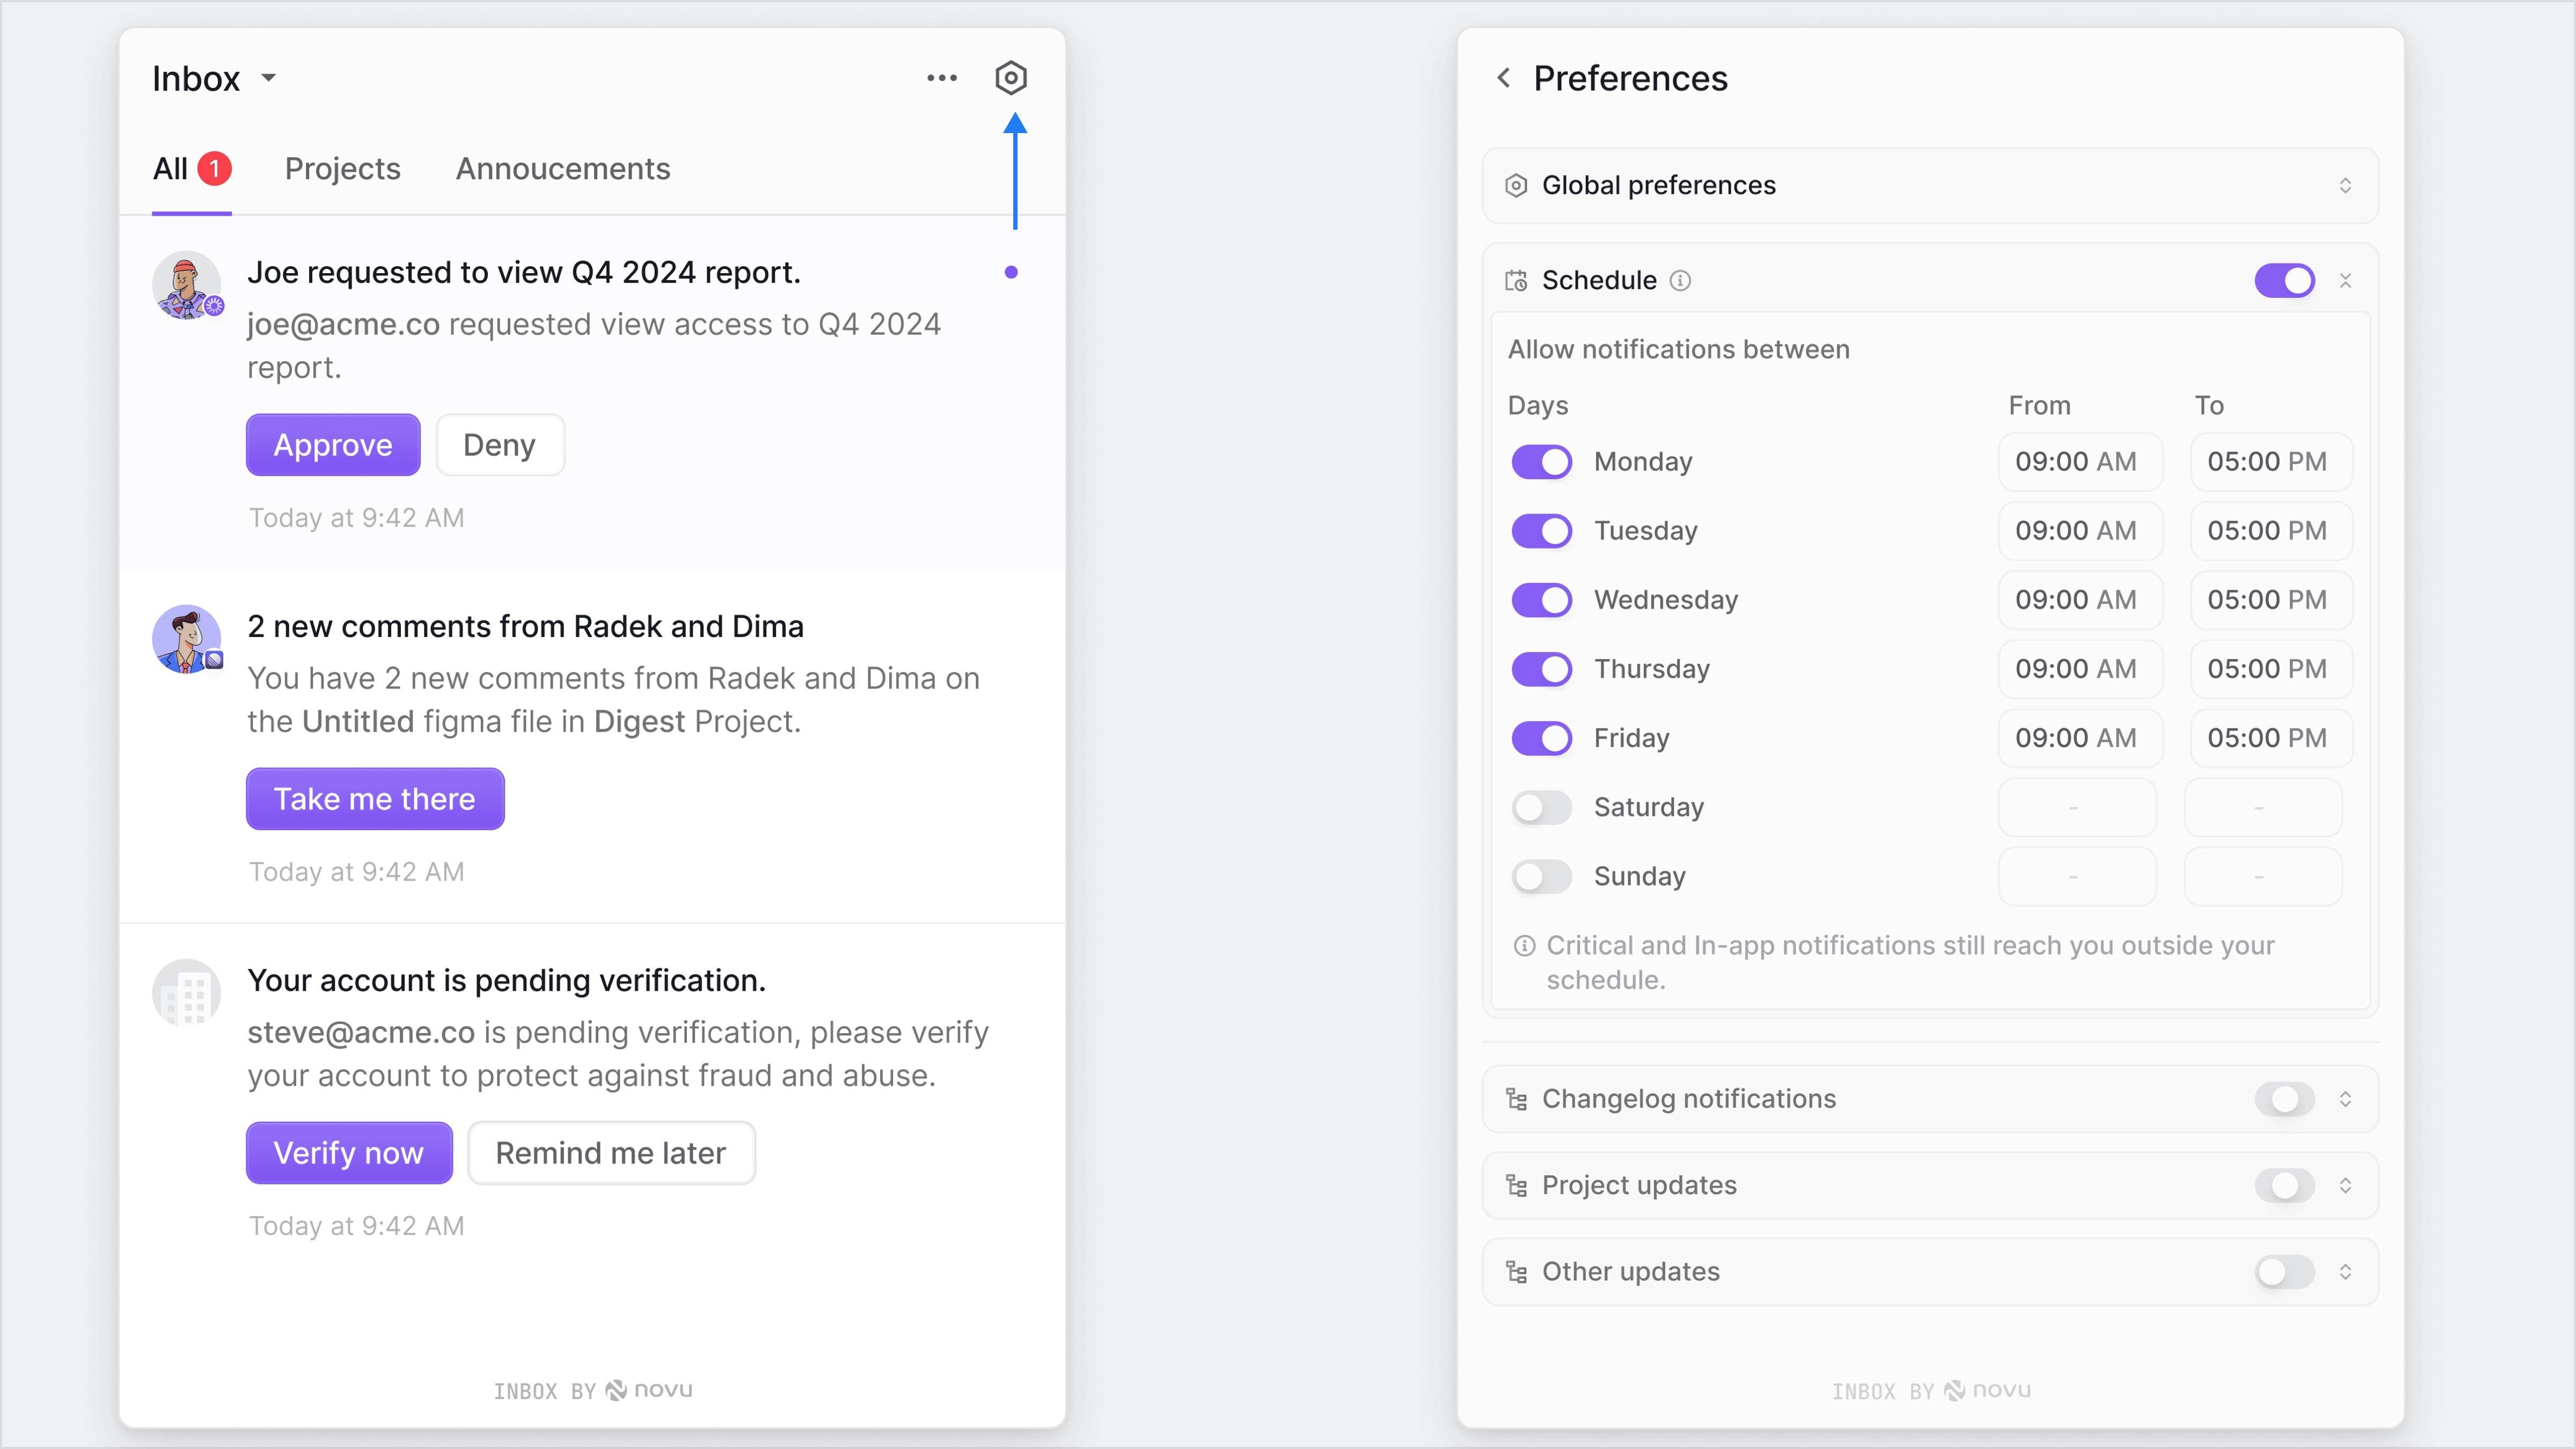
Enable the main schedule
The entire feature is controlled by a main schedule toggle. When a subscriber turns this on, they can begin configuring individual days. When it’s off, all other settings will be inactive, and notifications will be delivered normally.Setting daily availability
For each day of the week, the subscriber can:- Use the toggle next to the day’s name to activate or deactivate it.
- If activated, use the time-selector menus to set a “from” and “to” time. The time pickers are set to 30-minute increments for ease of use.
Edit or remove schedules
Existing availability can be adjusted at any time. Subscribers can:- Change the start and end times for a day.
- Re-enable a previously disabled day.
- Clear a schedule entirely to return to unrestricted delivery.
Copying times to multiple days
To make setup faster, subscribers can configure the time for one day and apply it to others in a few clicks:- Set the desired time range for a single day.
- Click Copy times to… associated with that day.
- In the menu that appears, select the other days of the week to apply this schedule to.
- Click “Apply.” The selected days will automatically be enabled and updated with the new time range.
Automatic saving
All changes made in the schedule interface will be saved automatically in the background. The UI updates optimistically, providing a seamless experience without requiring the subscriber to click save.Set default schedule for Subscribers
You can provide a default schedule for your subscribers by passing thedefaultSchedule prop to the <Inbox />. This is useful for pre-configuring a recommended schedule that your subscribers can then customize.
This default schedule only applies if a subscriber has not yet configured their own schedule. Once they make any changes, their custom schedule takes precedence.