How to configure Expo with Novu
Before you can send notifications, you must connect your Expo project to Novu by generating an access token and adding it to your integration settings.Step 1: Generate your access token from Expo Push
Generate an access token from your dashboard. This token authorizes Novu to send notifications on behalf of your project.1
Log in to Expo
Sign in at the Expo console.
2
Open Access Token
Navigate to the Credentials section in the project settings sidebar.
Click Access Token.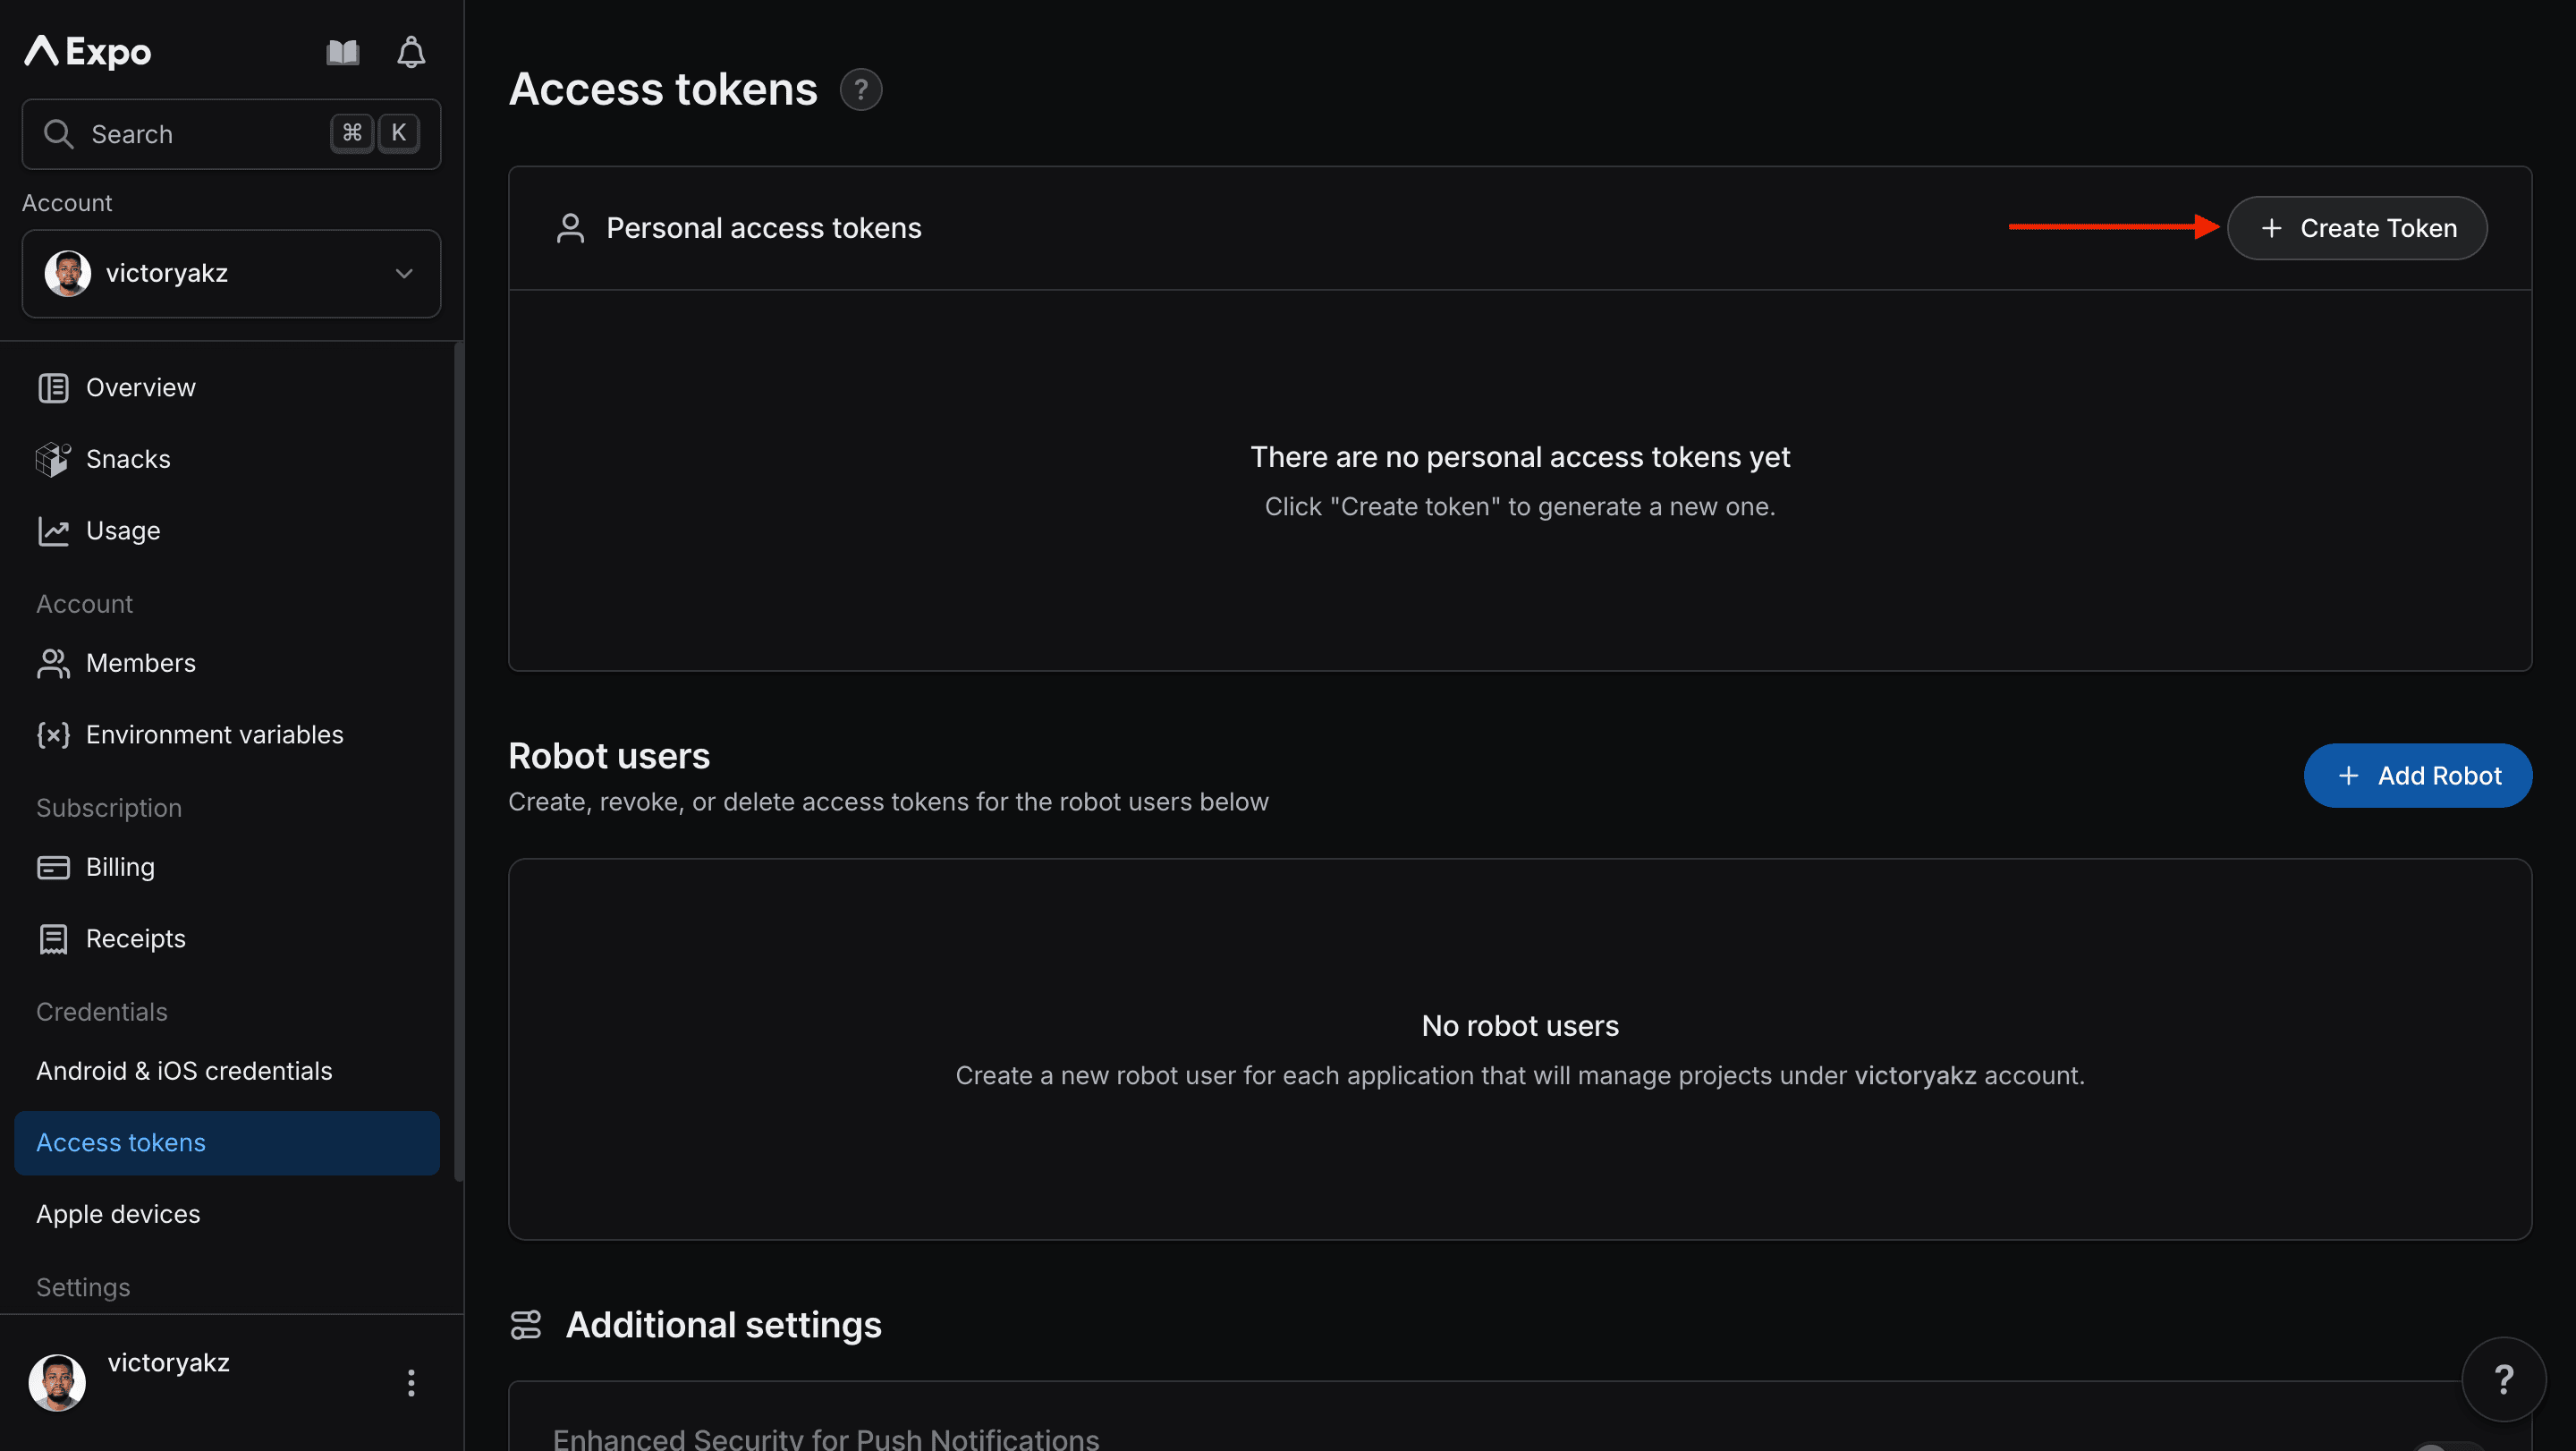
3
Create a token
A menu appears.
4
Generate the token
Give it a descriptive name, and then click Generate New Token.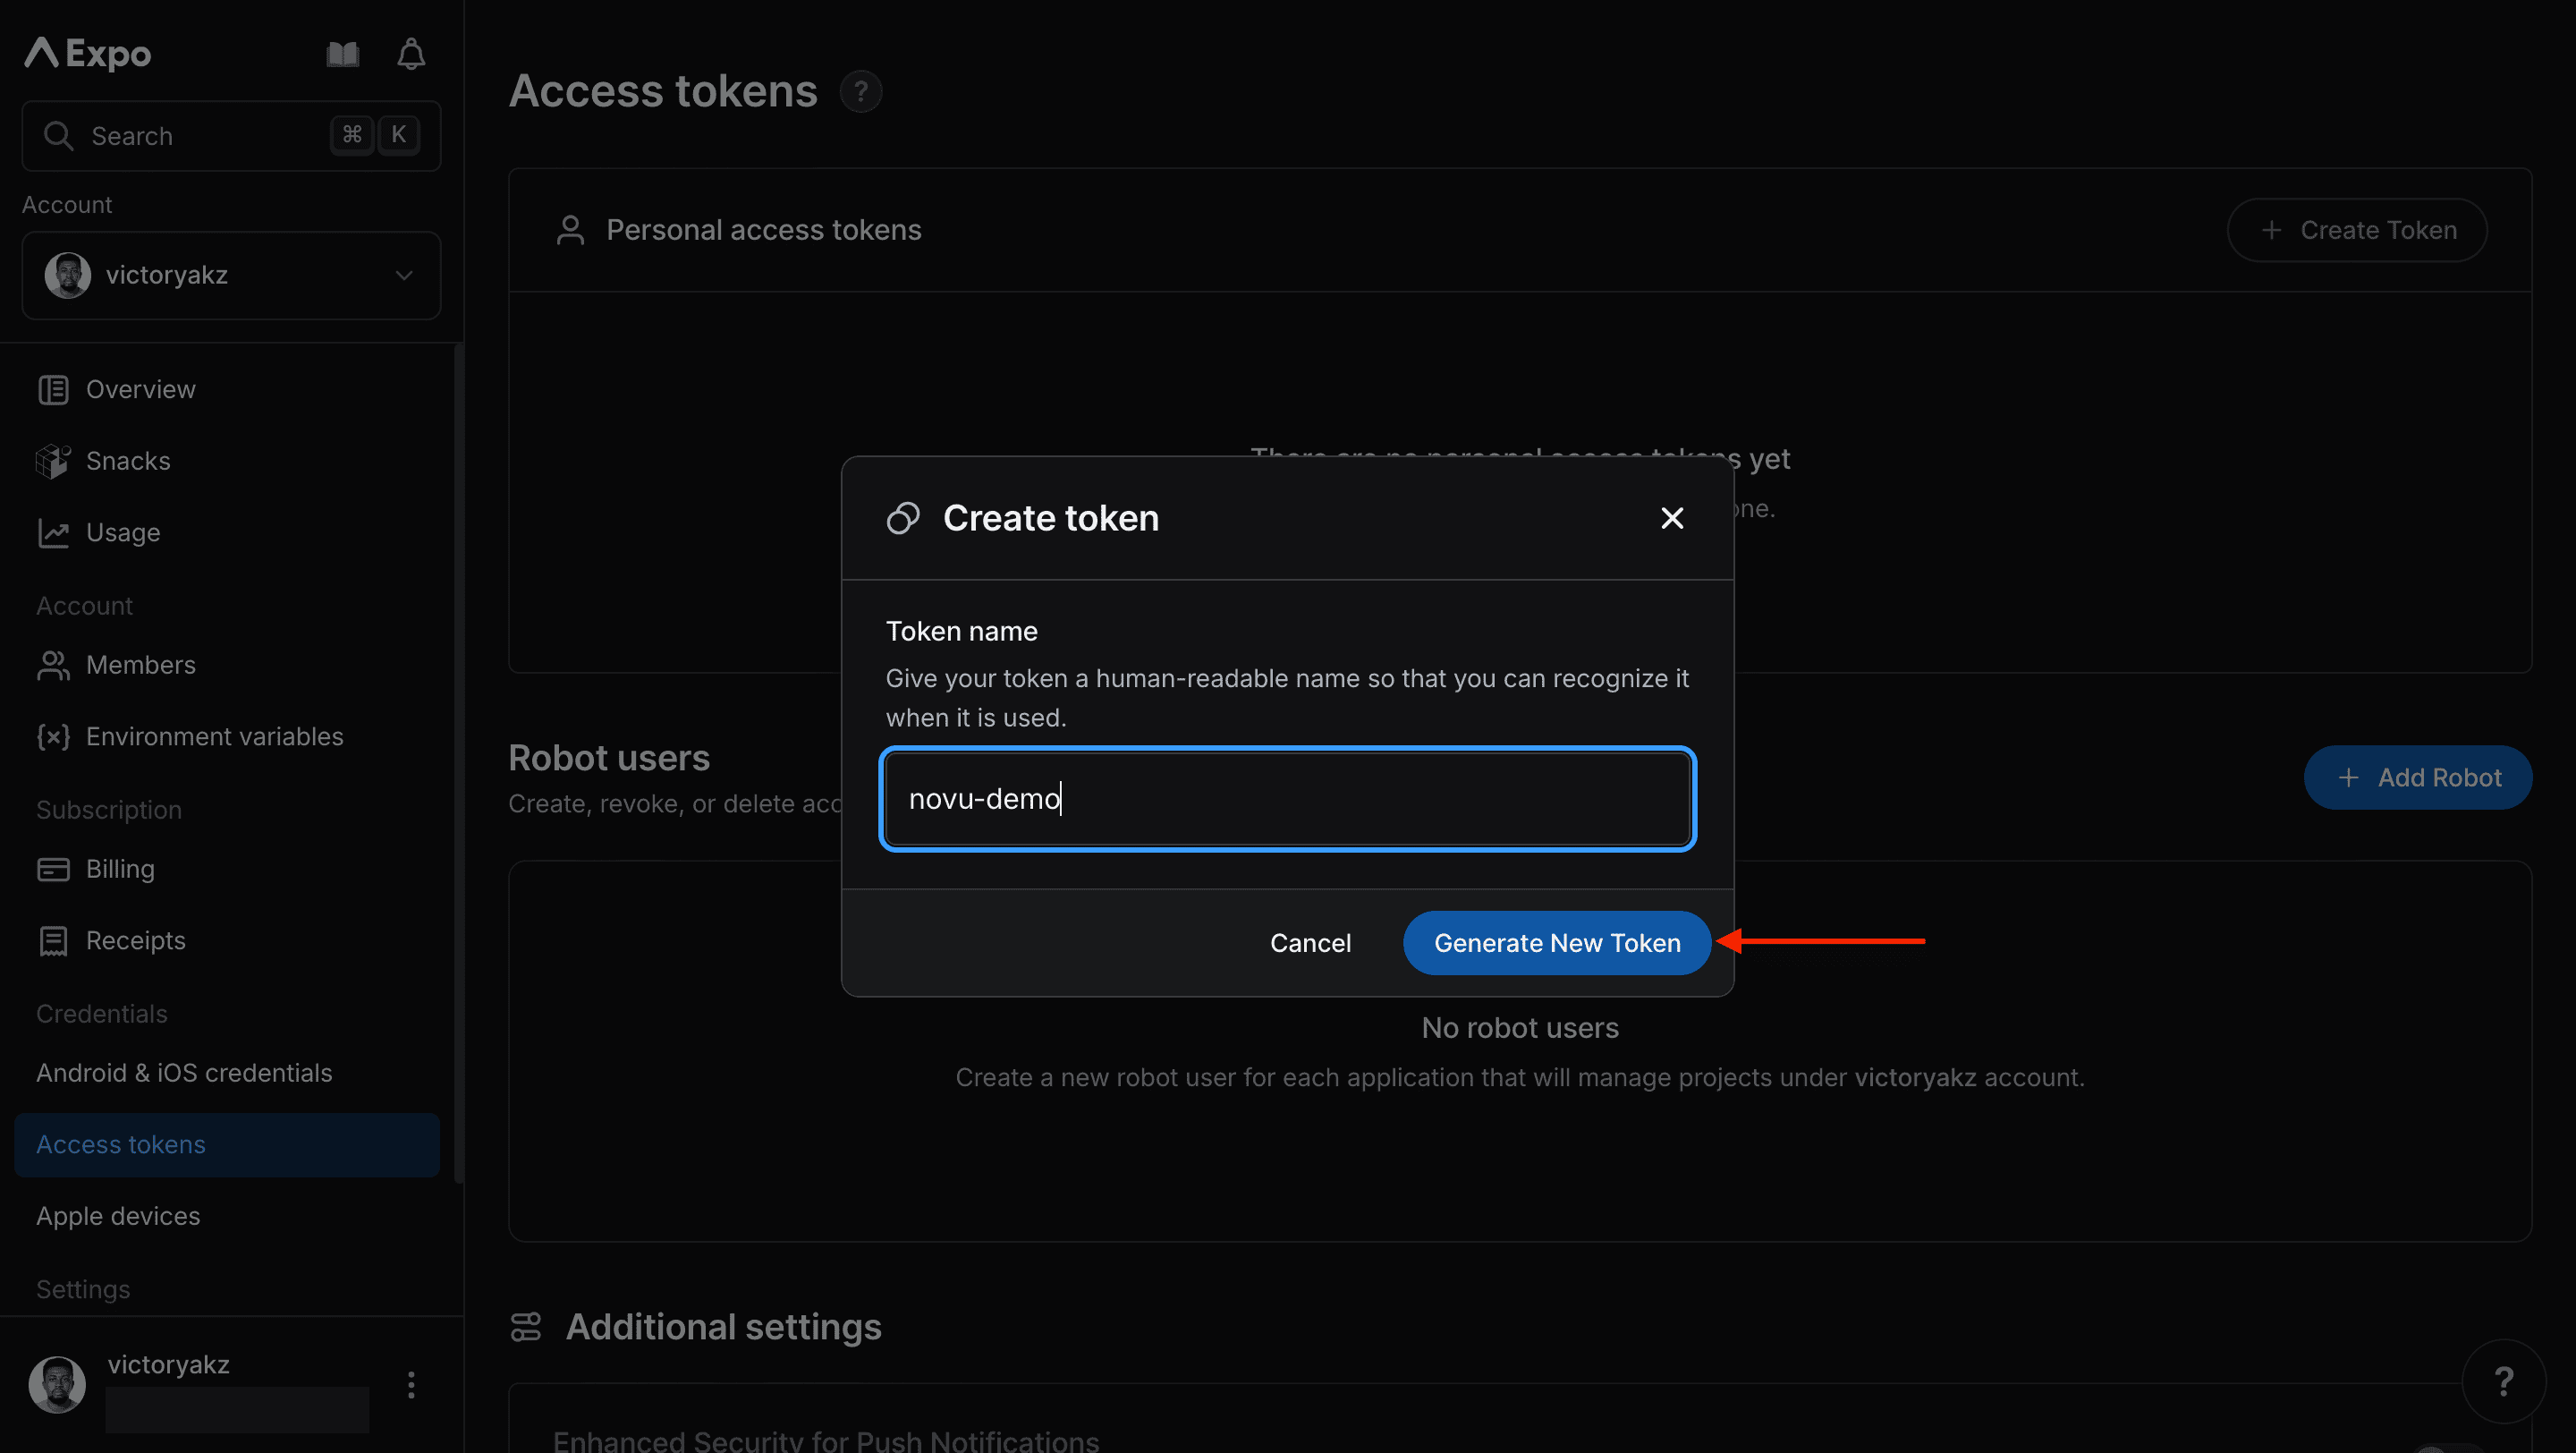
5
Copy the token
Copy and save the generated access token. You need it in the next step.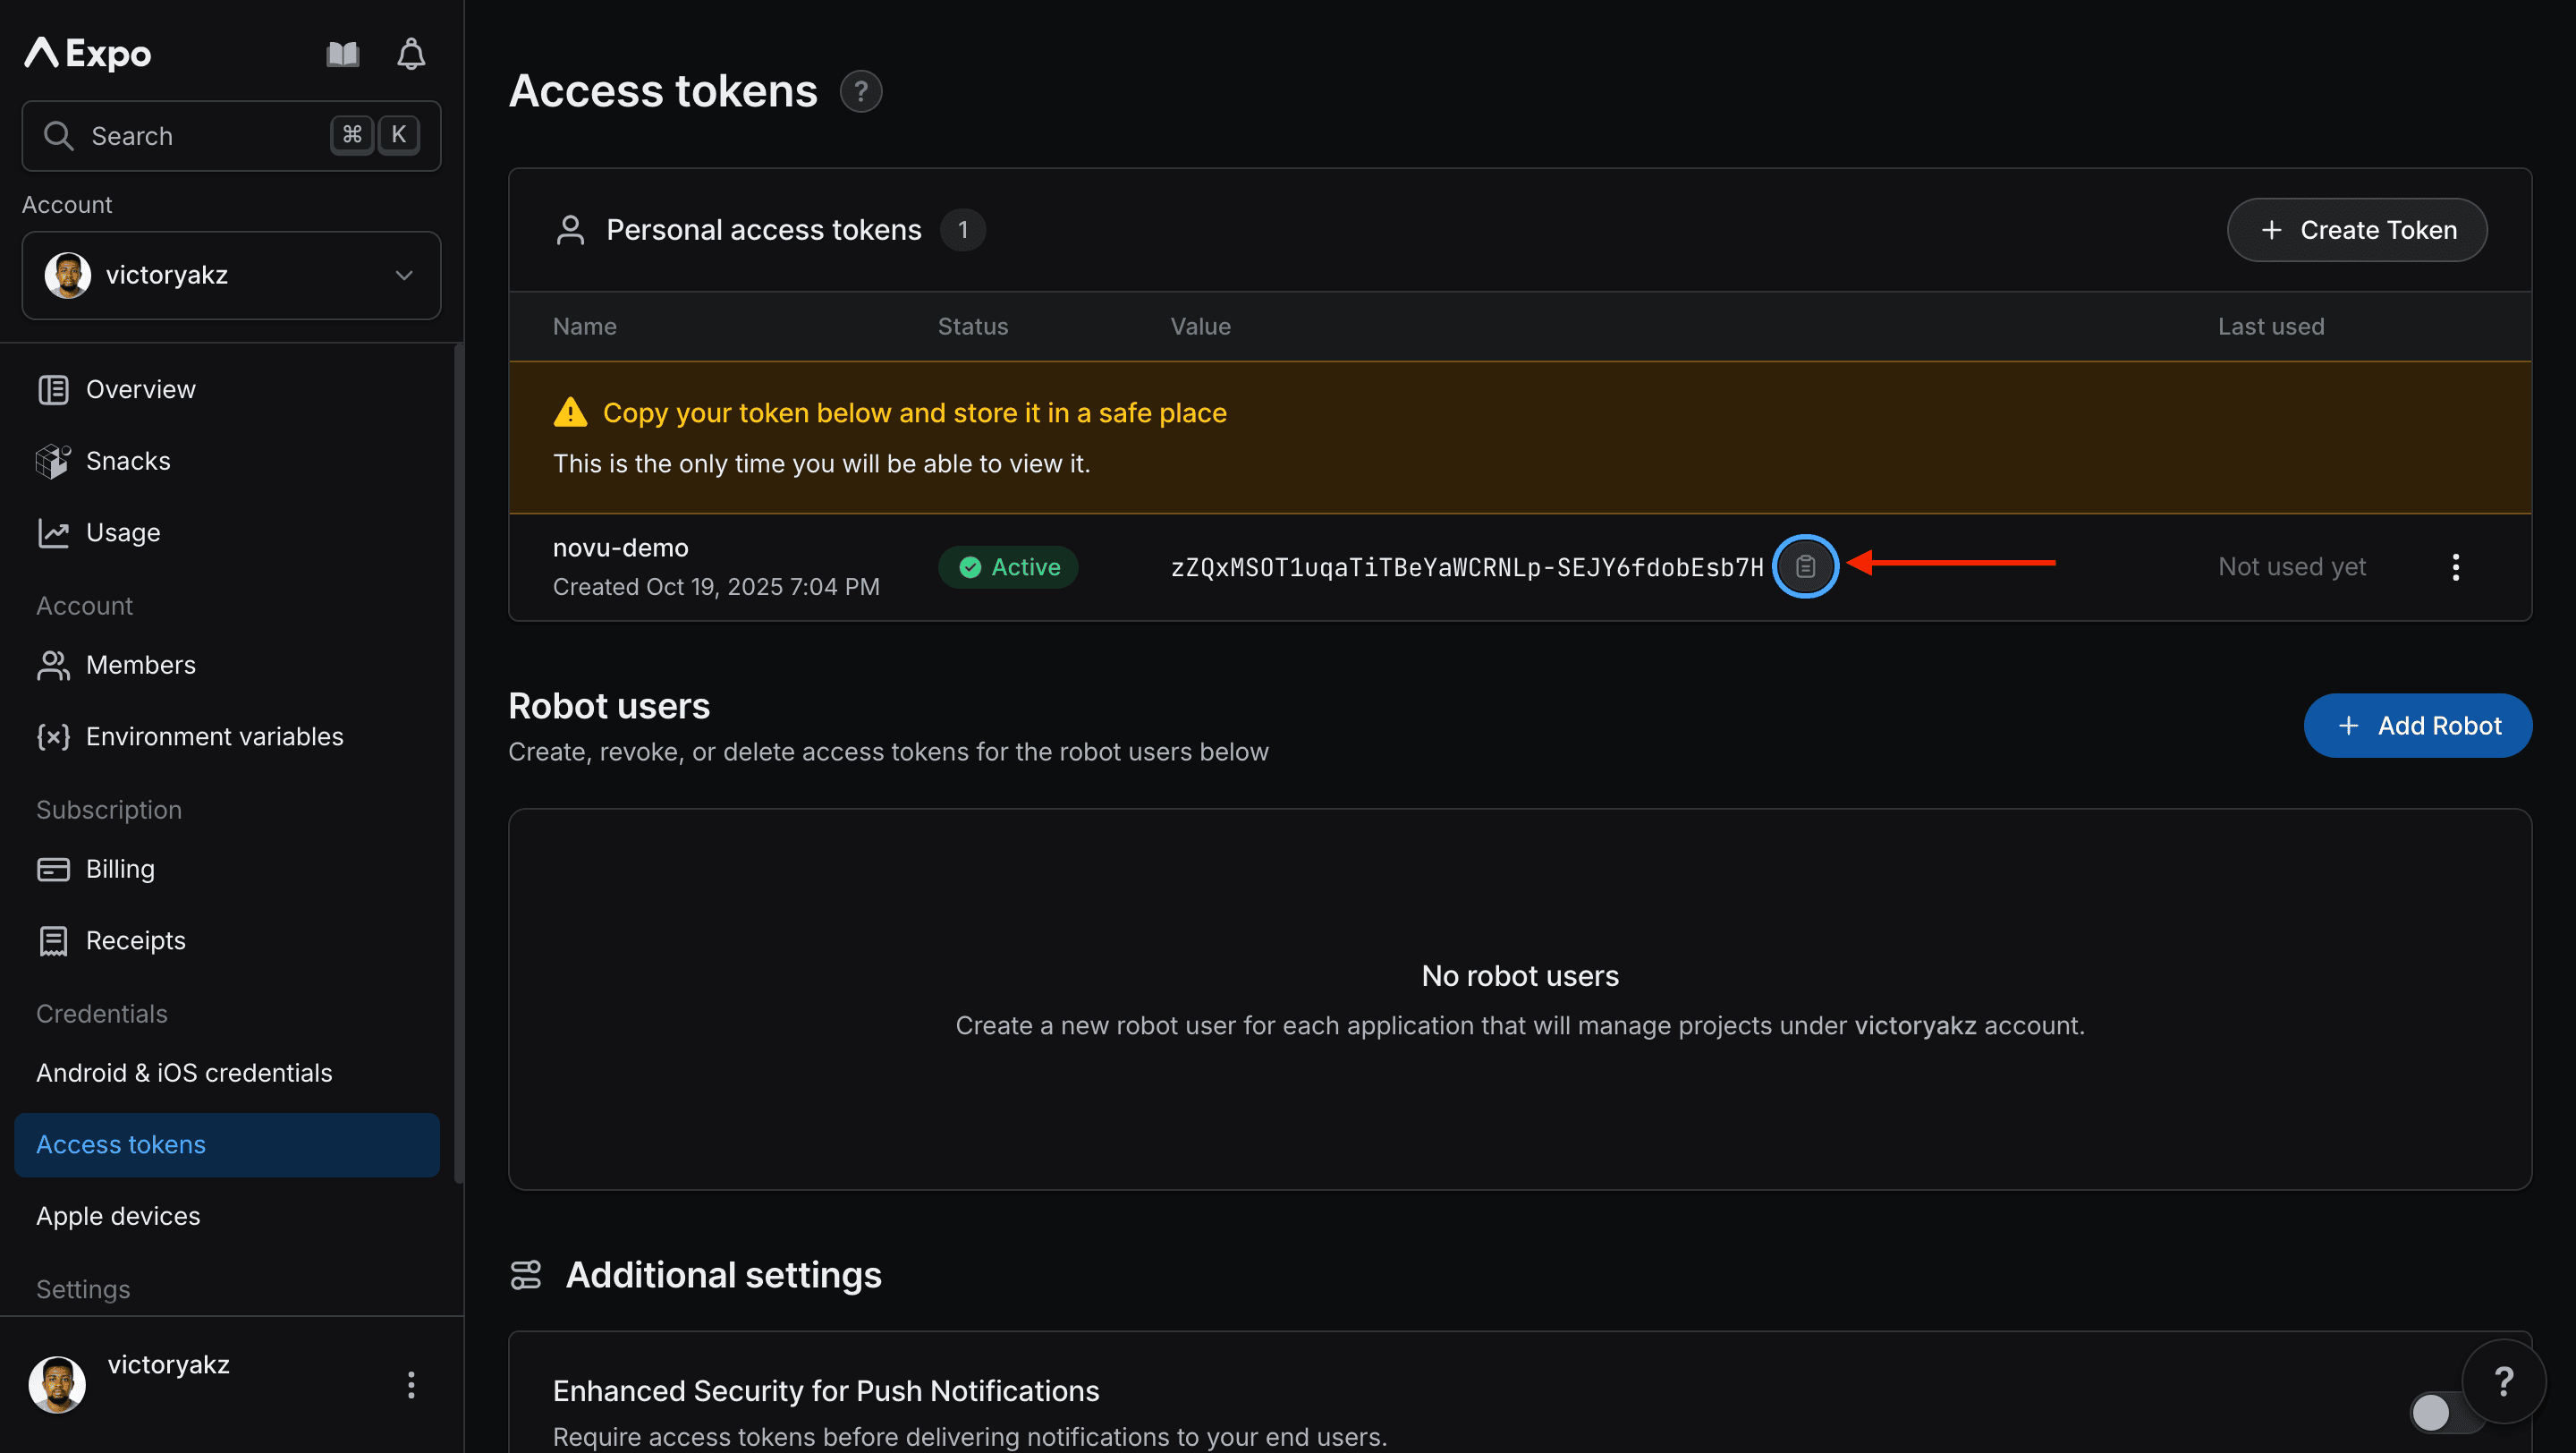
Step 2: Connect Expo Push to Novu
Next, add the access token to your Expo integration in the Novu dashboard.1
Log in to the Novu dashboard
Open the Novu Dashboard.
2
Open Integration Store
On the Novu dashboard, navigate to the Integration Store.
3
Connect a provider
In the Integration Store, click Connect provider to begin setup.
4
Select Expo Push
In the Push tab, choose Expo Push from the provider list.
5
Paste the access token
In the Expo integration form, paste the access token that you copied from Expo into the Access Token field.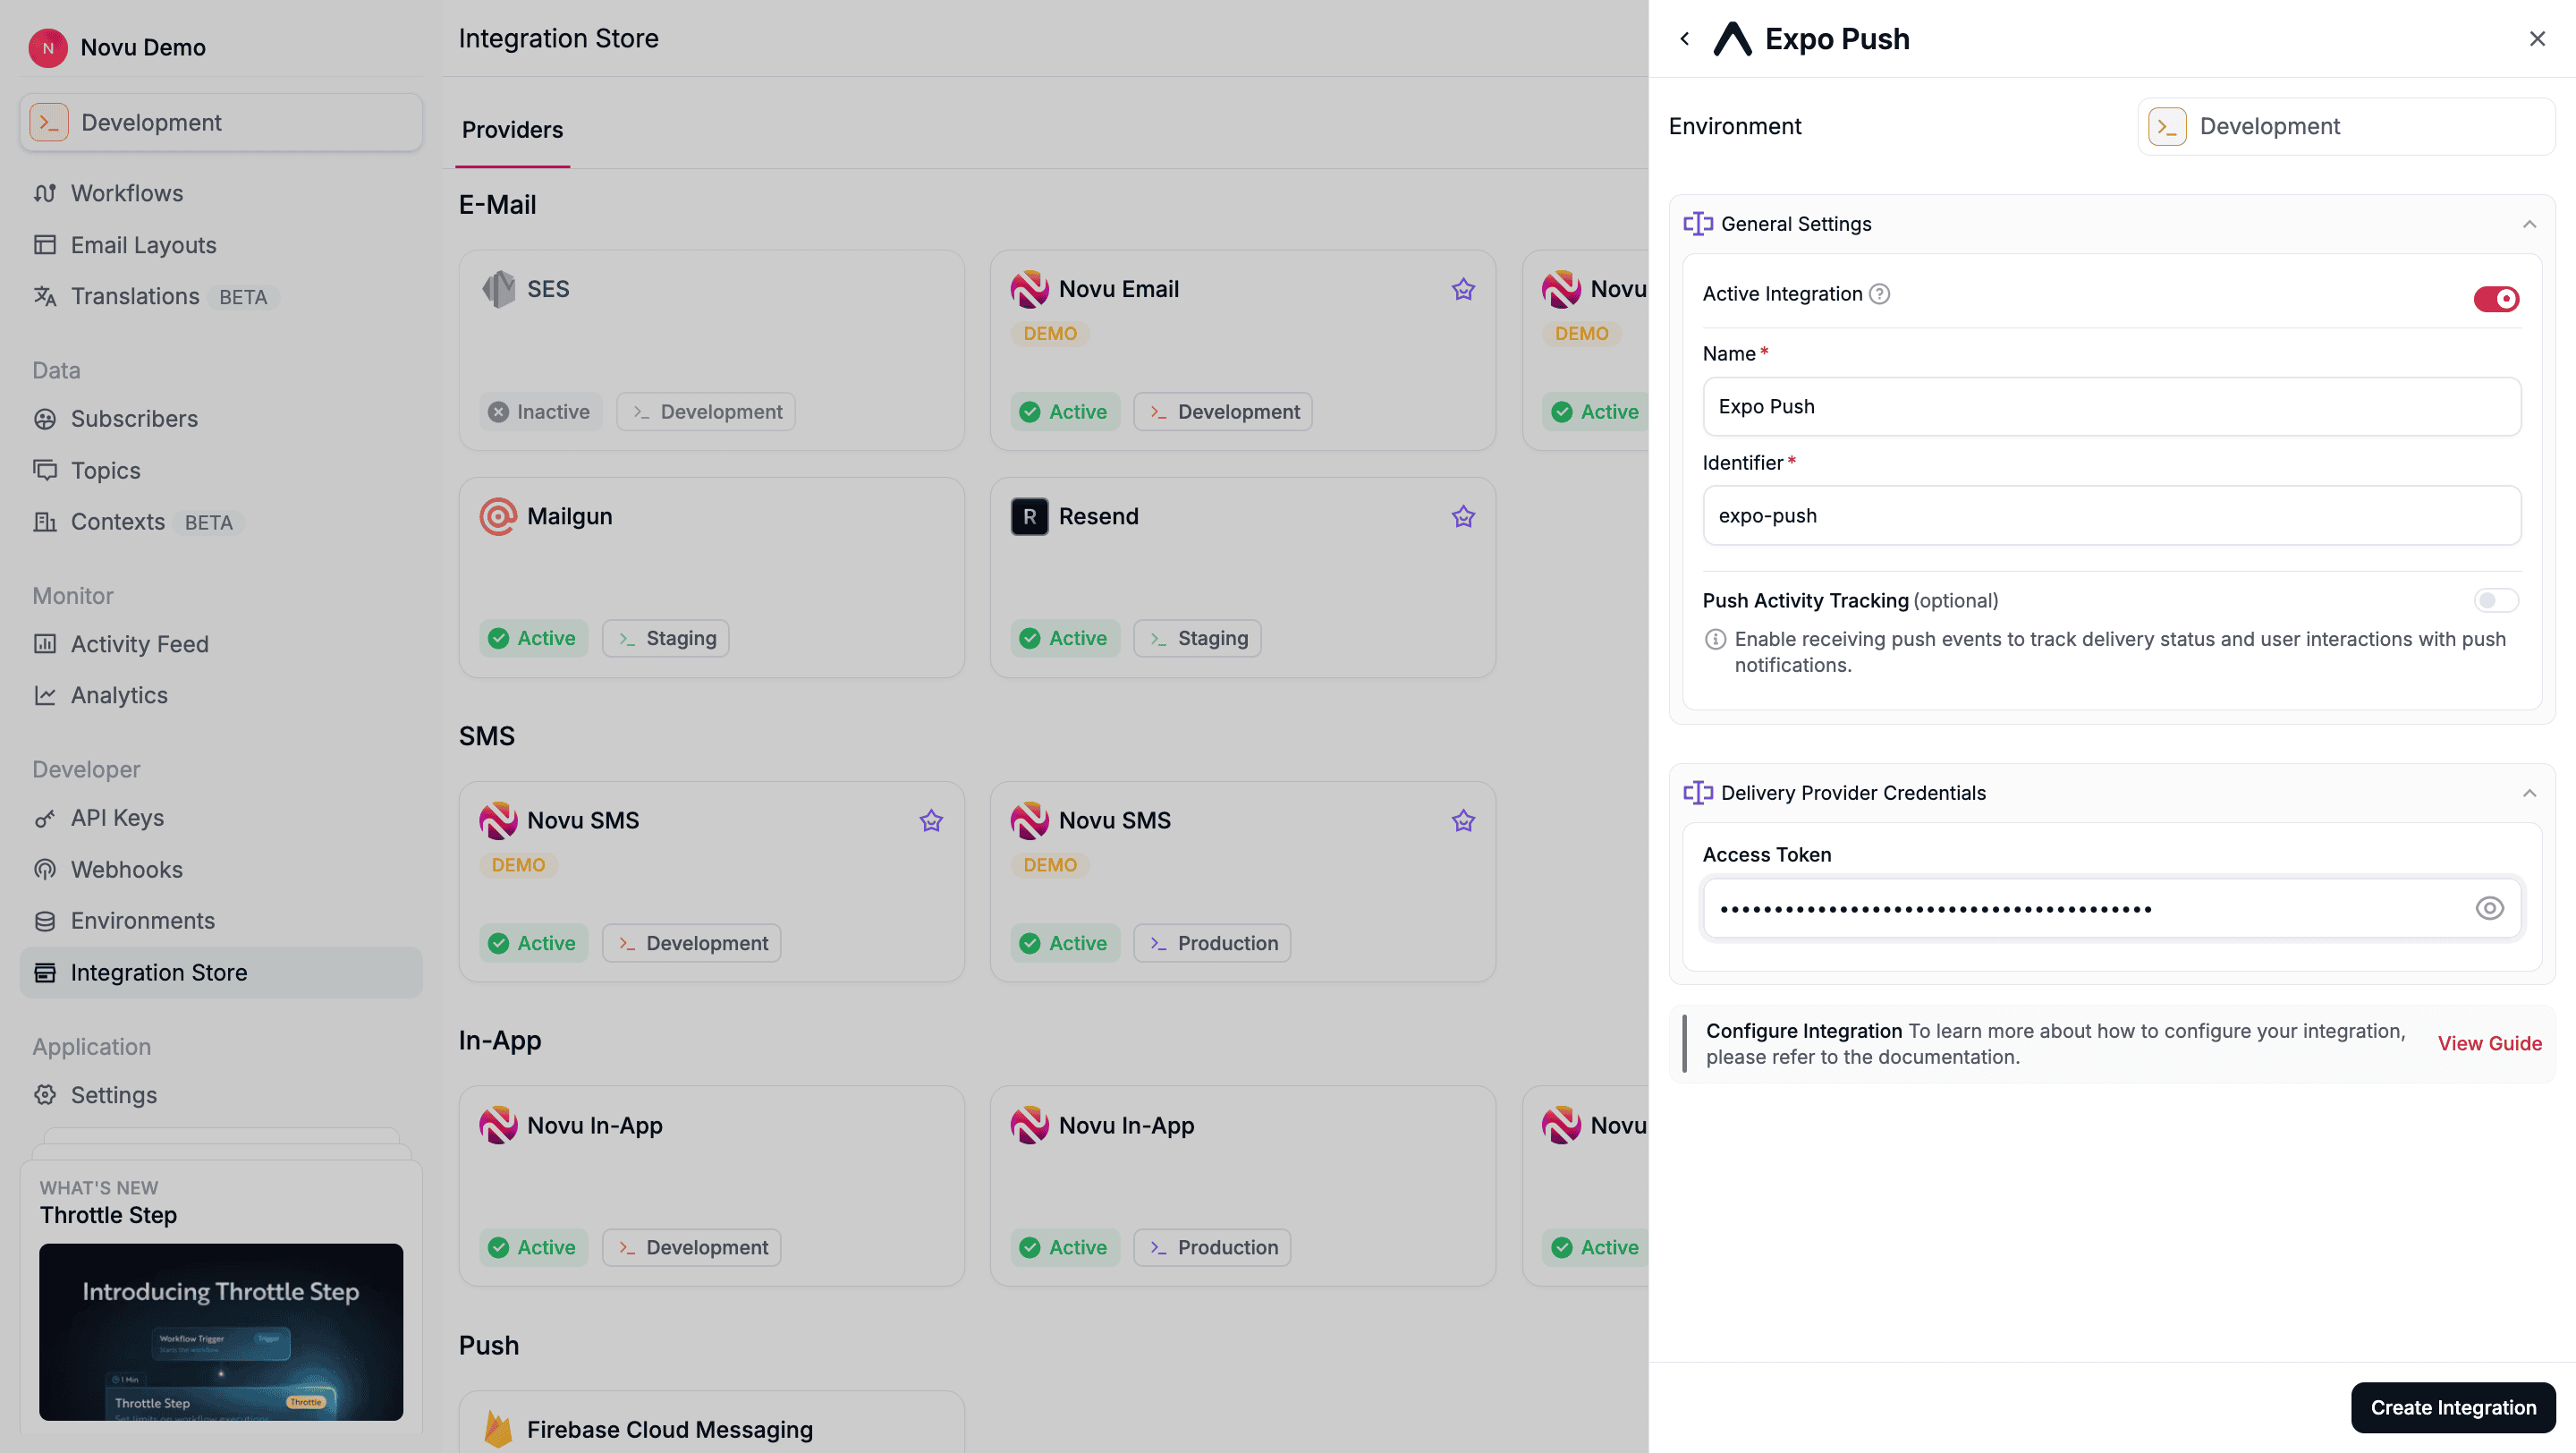
6
Create the integration
Review your credentials, then click Create Integration to save.
Using Expo Push with Novu
Once your integration is configured, you can start sending push notifications by registering your subscribers’ device tokens and triggering a workflow.Step 1: Add subscriber device token
Before Novu can send a push notification to a subscriber (user), you must associate their device’s unique push token with their Novu subscriber profile. You can do this by making an API call to update the subscriber’s credentials.- Node.js
- Python
- Go
- PHP
- .NET
- Java
- cURL
Novu automatically removes invalid device tokens from a subscribers’ profile and then sends the failure details to the
MESSAGE_FAILED webhook.Step 2: Send a notification
Now you’re ready to send a push notification.- Node.js
- Python
- Go
- PHP
- .NET
- Java
- cURL
Using overrides to customize notifications
- Node.js
- Python
- Go
- PHP
- .NET
- Java
- cURL