access forbidden error. This indicates that Novu lacks the permissions needed to configure the webhook on your behalf.
Email Activity Tracking is available on Novu Cloud and Enterprise self-hosted only. It is not included in the Community self-hosted edition. Contact us at [email protected] to learn more about Enterprise self-hosted licensing.
Step 1: Update SendGrid API key permissions
First, you need to update your API key in your SendGrid account to grant the necessary permissions.- Log in to your SendGrid account.
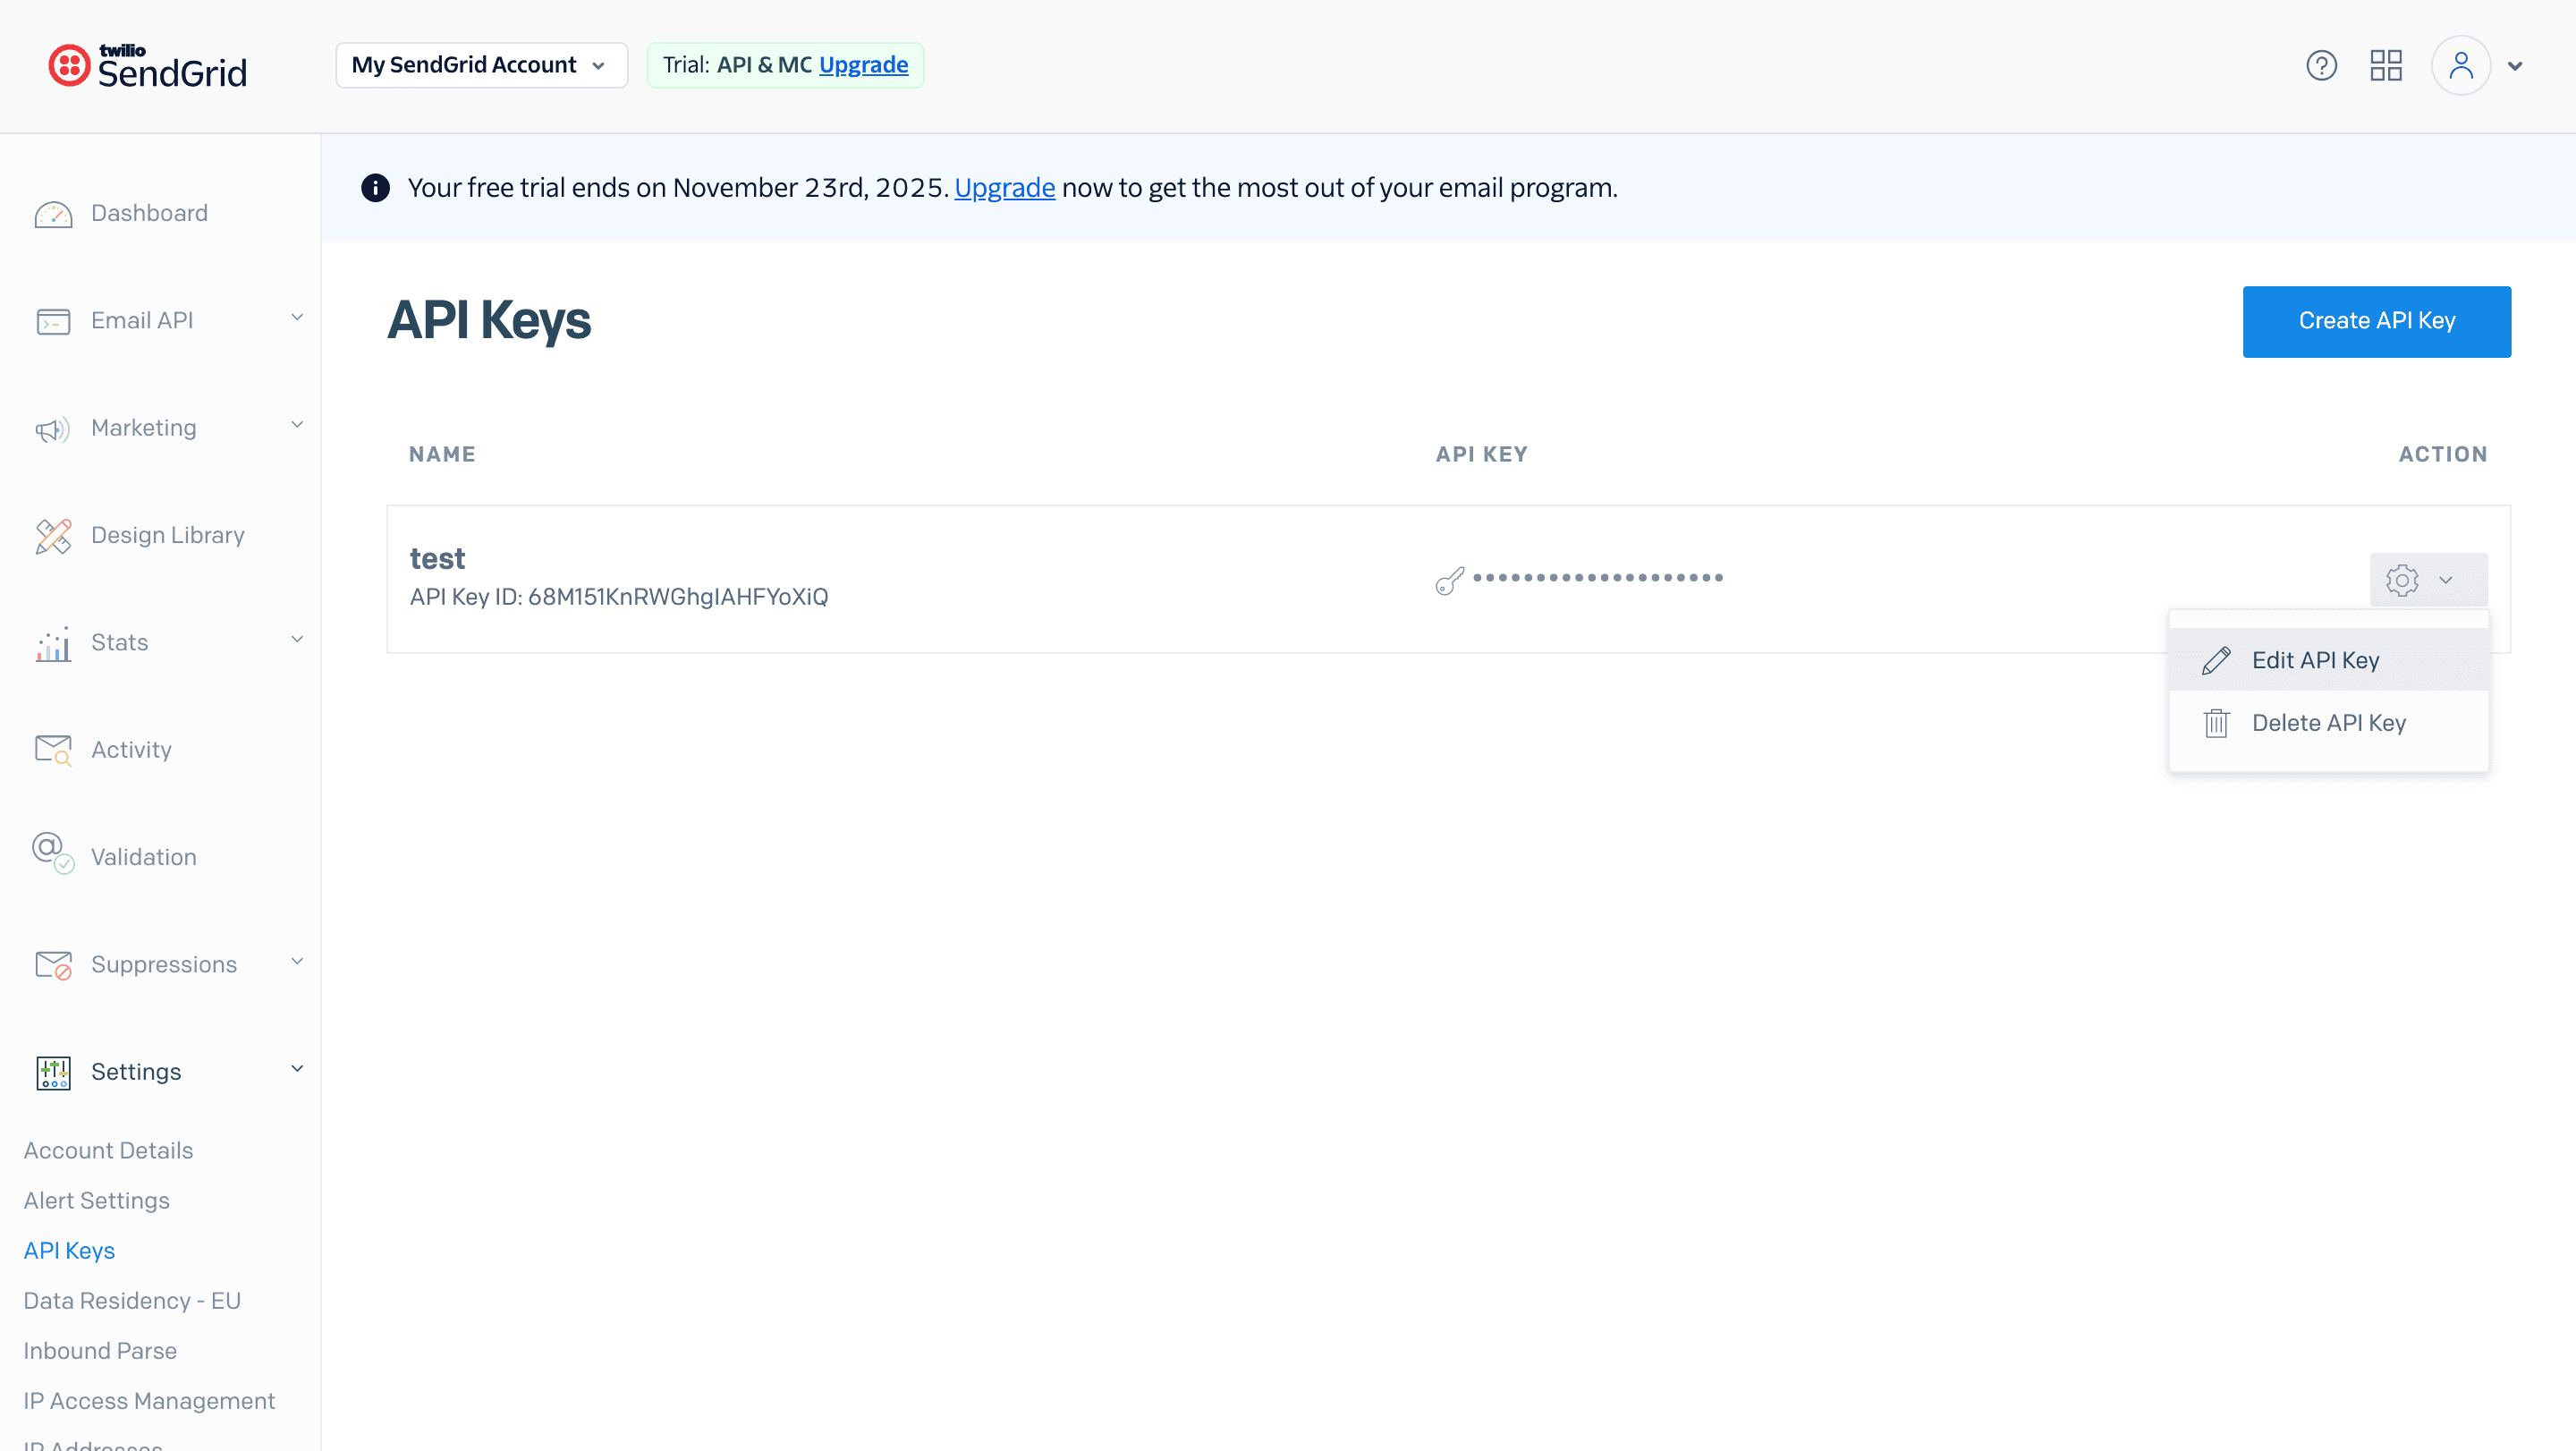
- Under Settings, click API Keys.
- Choose whether to edit an existing key or create a new one:
- To create a new API key, click Create API Key.
- To update an existing key, click the settings icon next to it and select Edit API Key.
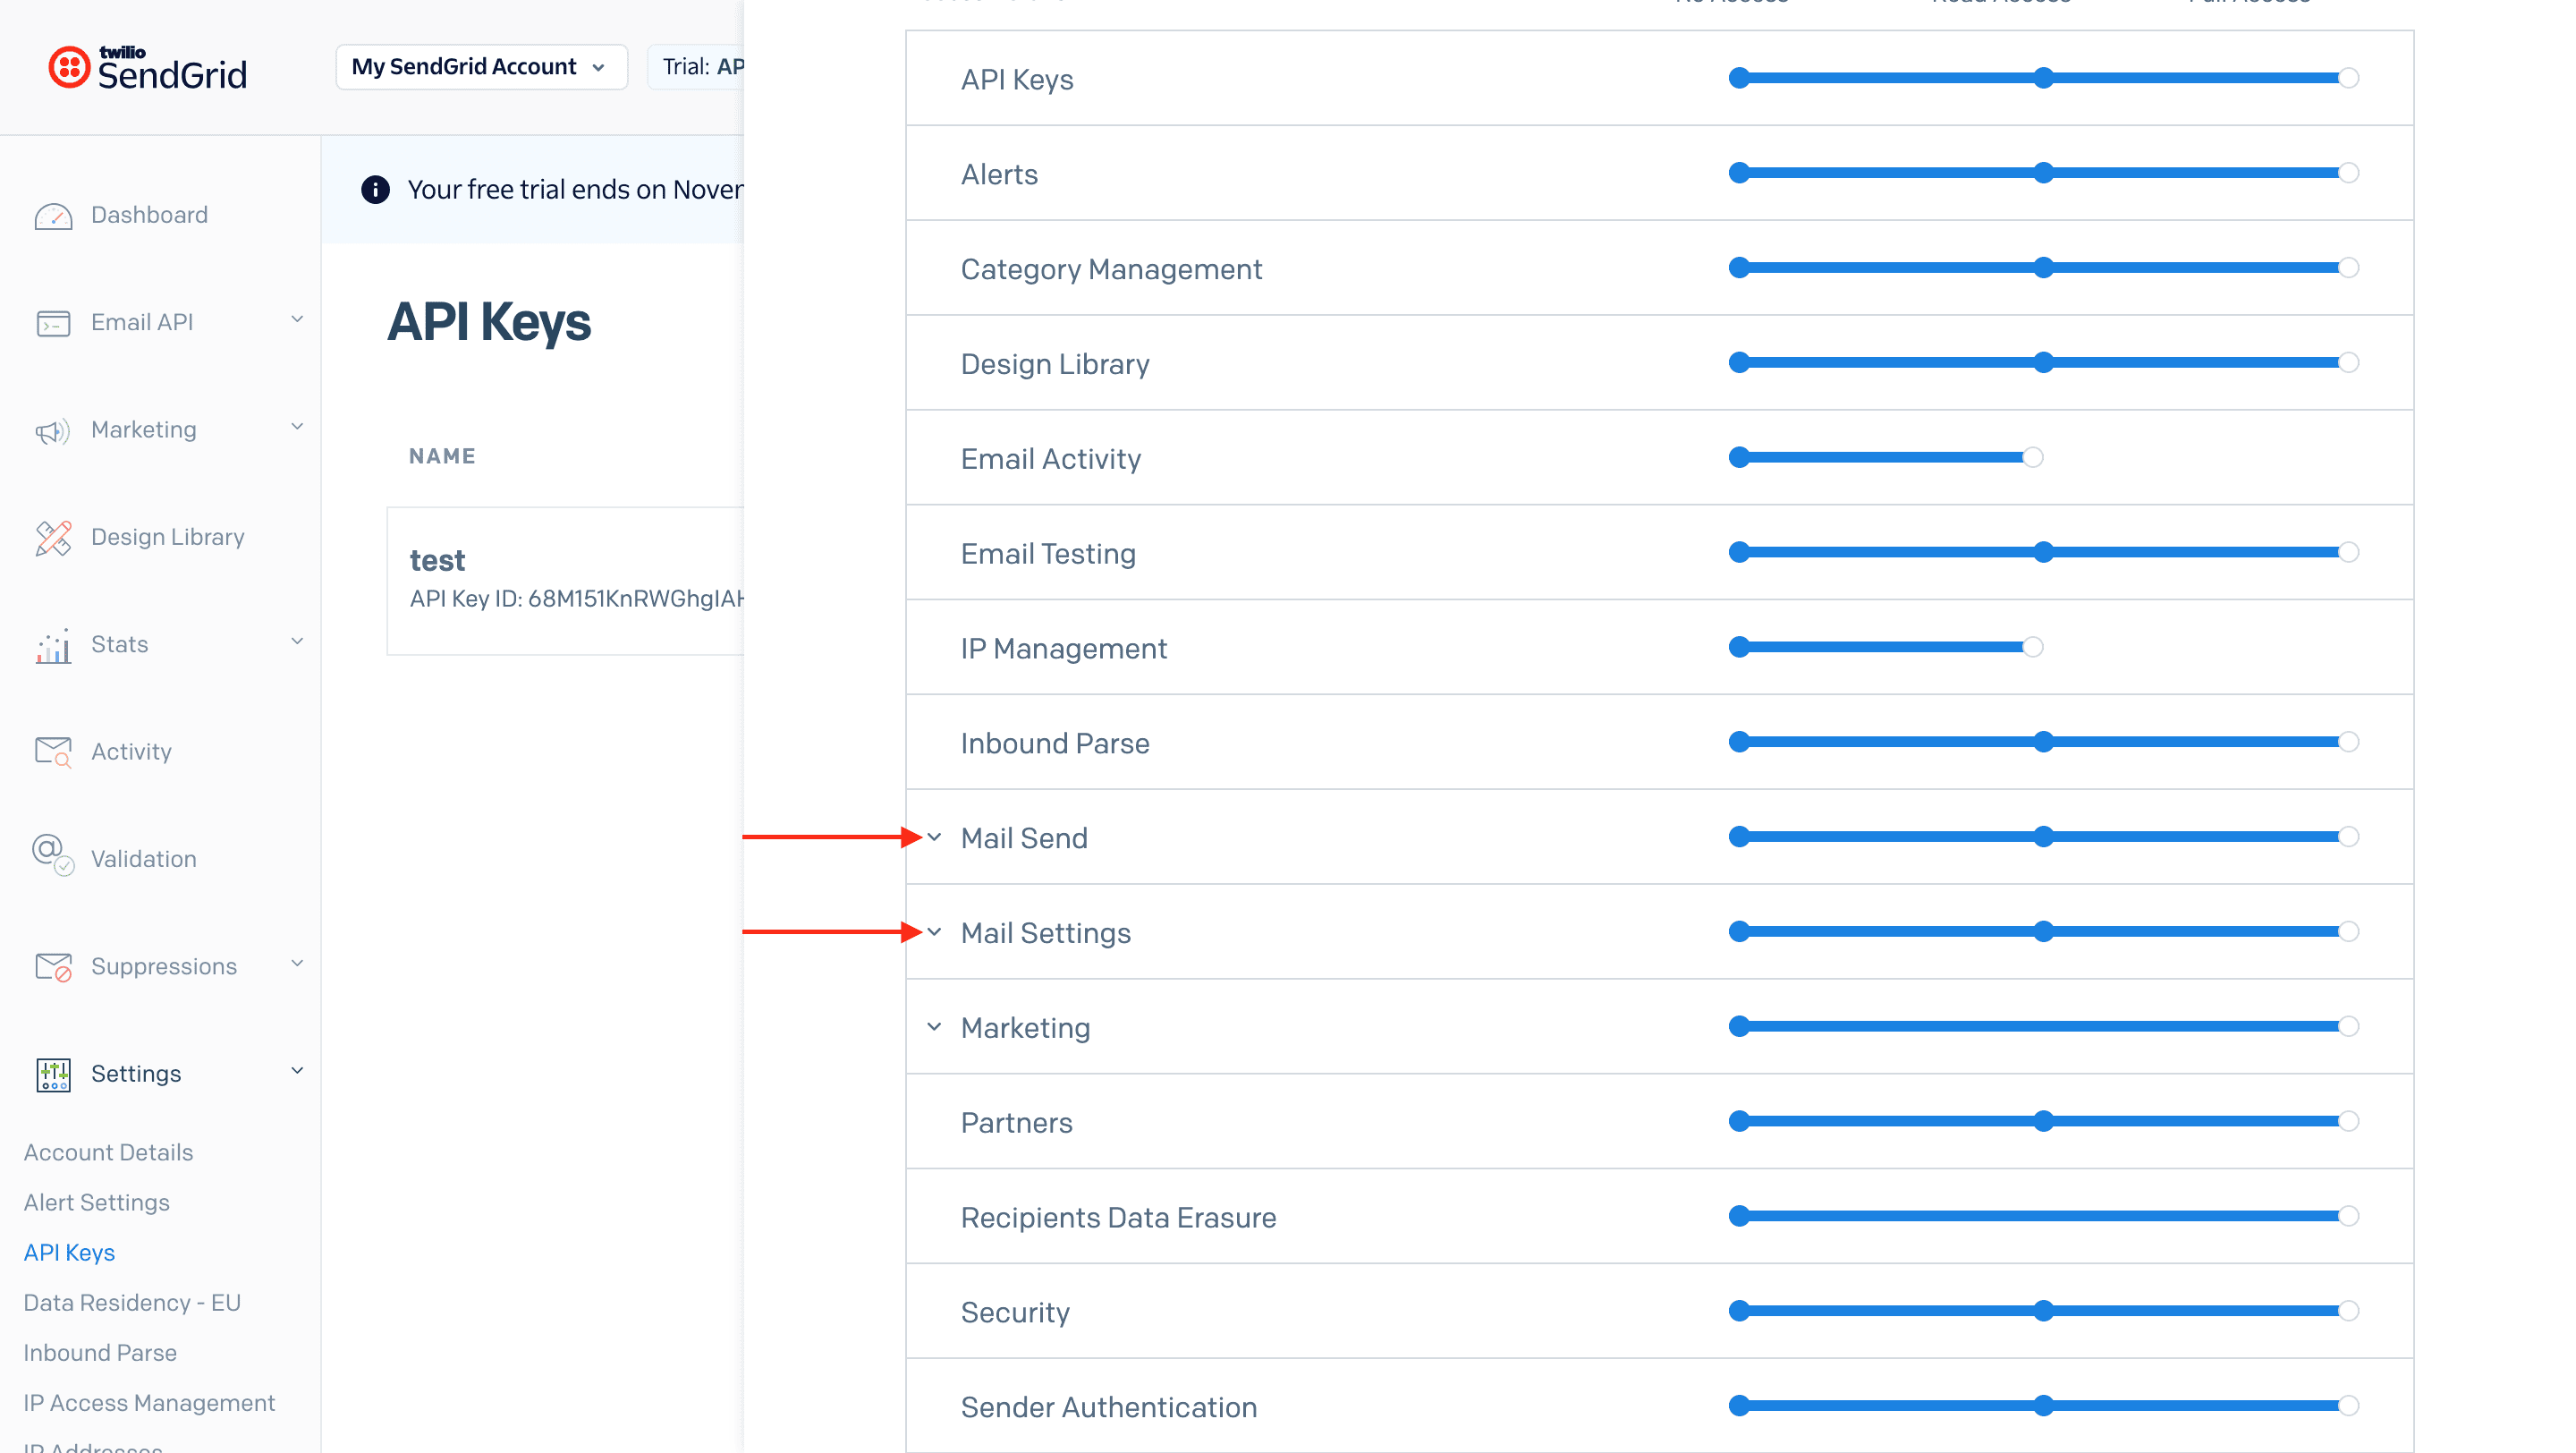
- Set the key permissions to either:
- Full Access, or
- Custom Access with at least the following enabled:
- Mail Send
- Mail Settings
- If you created a new key, return to the Novu dashboard and update your SendGrid integration settings with the new API key.
Step 2: Enable activity tracking in Novu
Once your API key has the correct permissions, return to your Novu dashboard to complete the setup.- Navigate to the Integrations page and select your SendGrid integration.
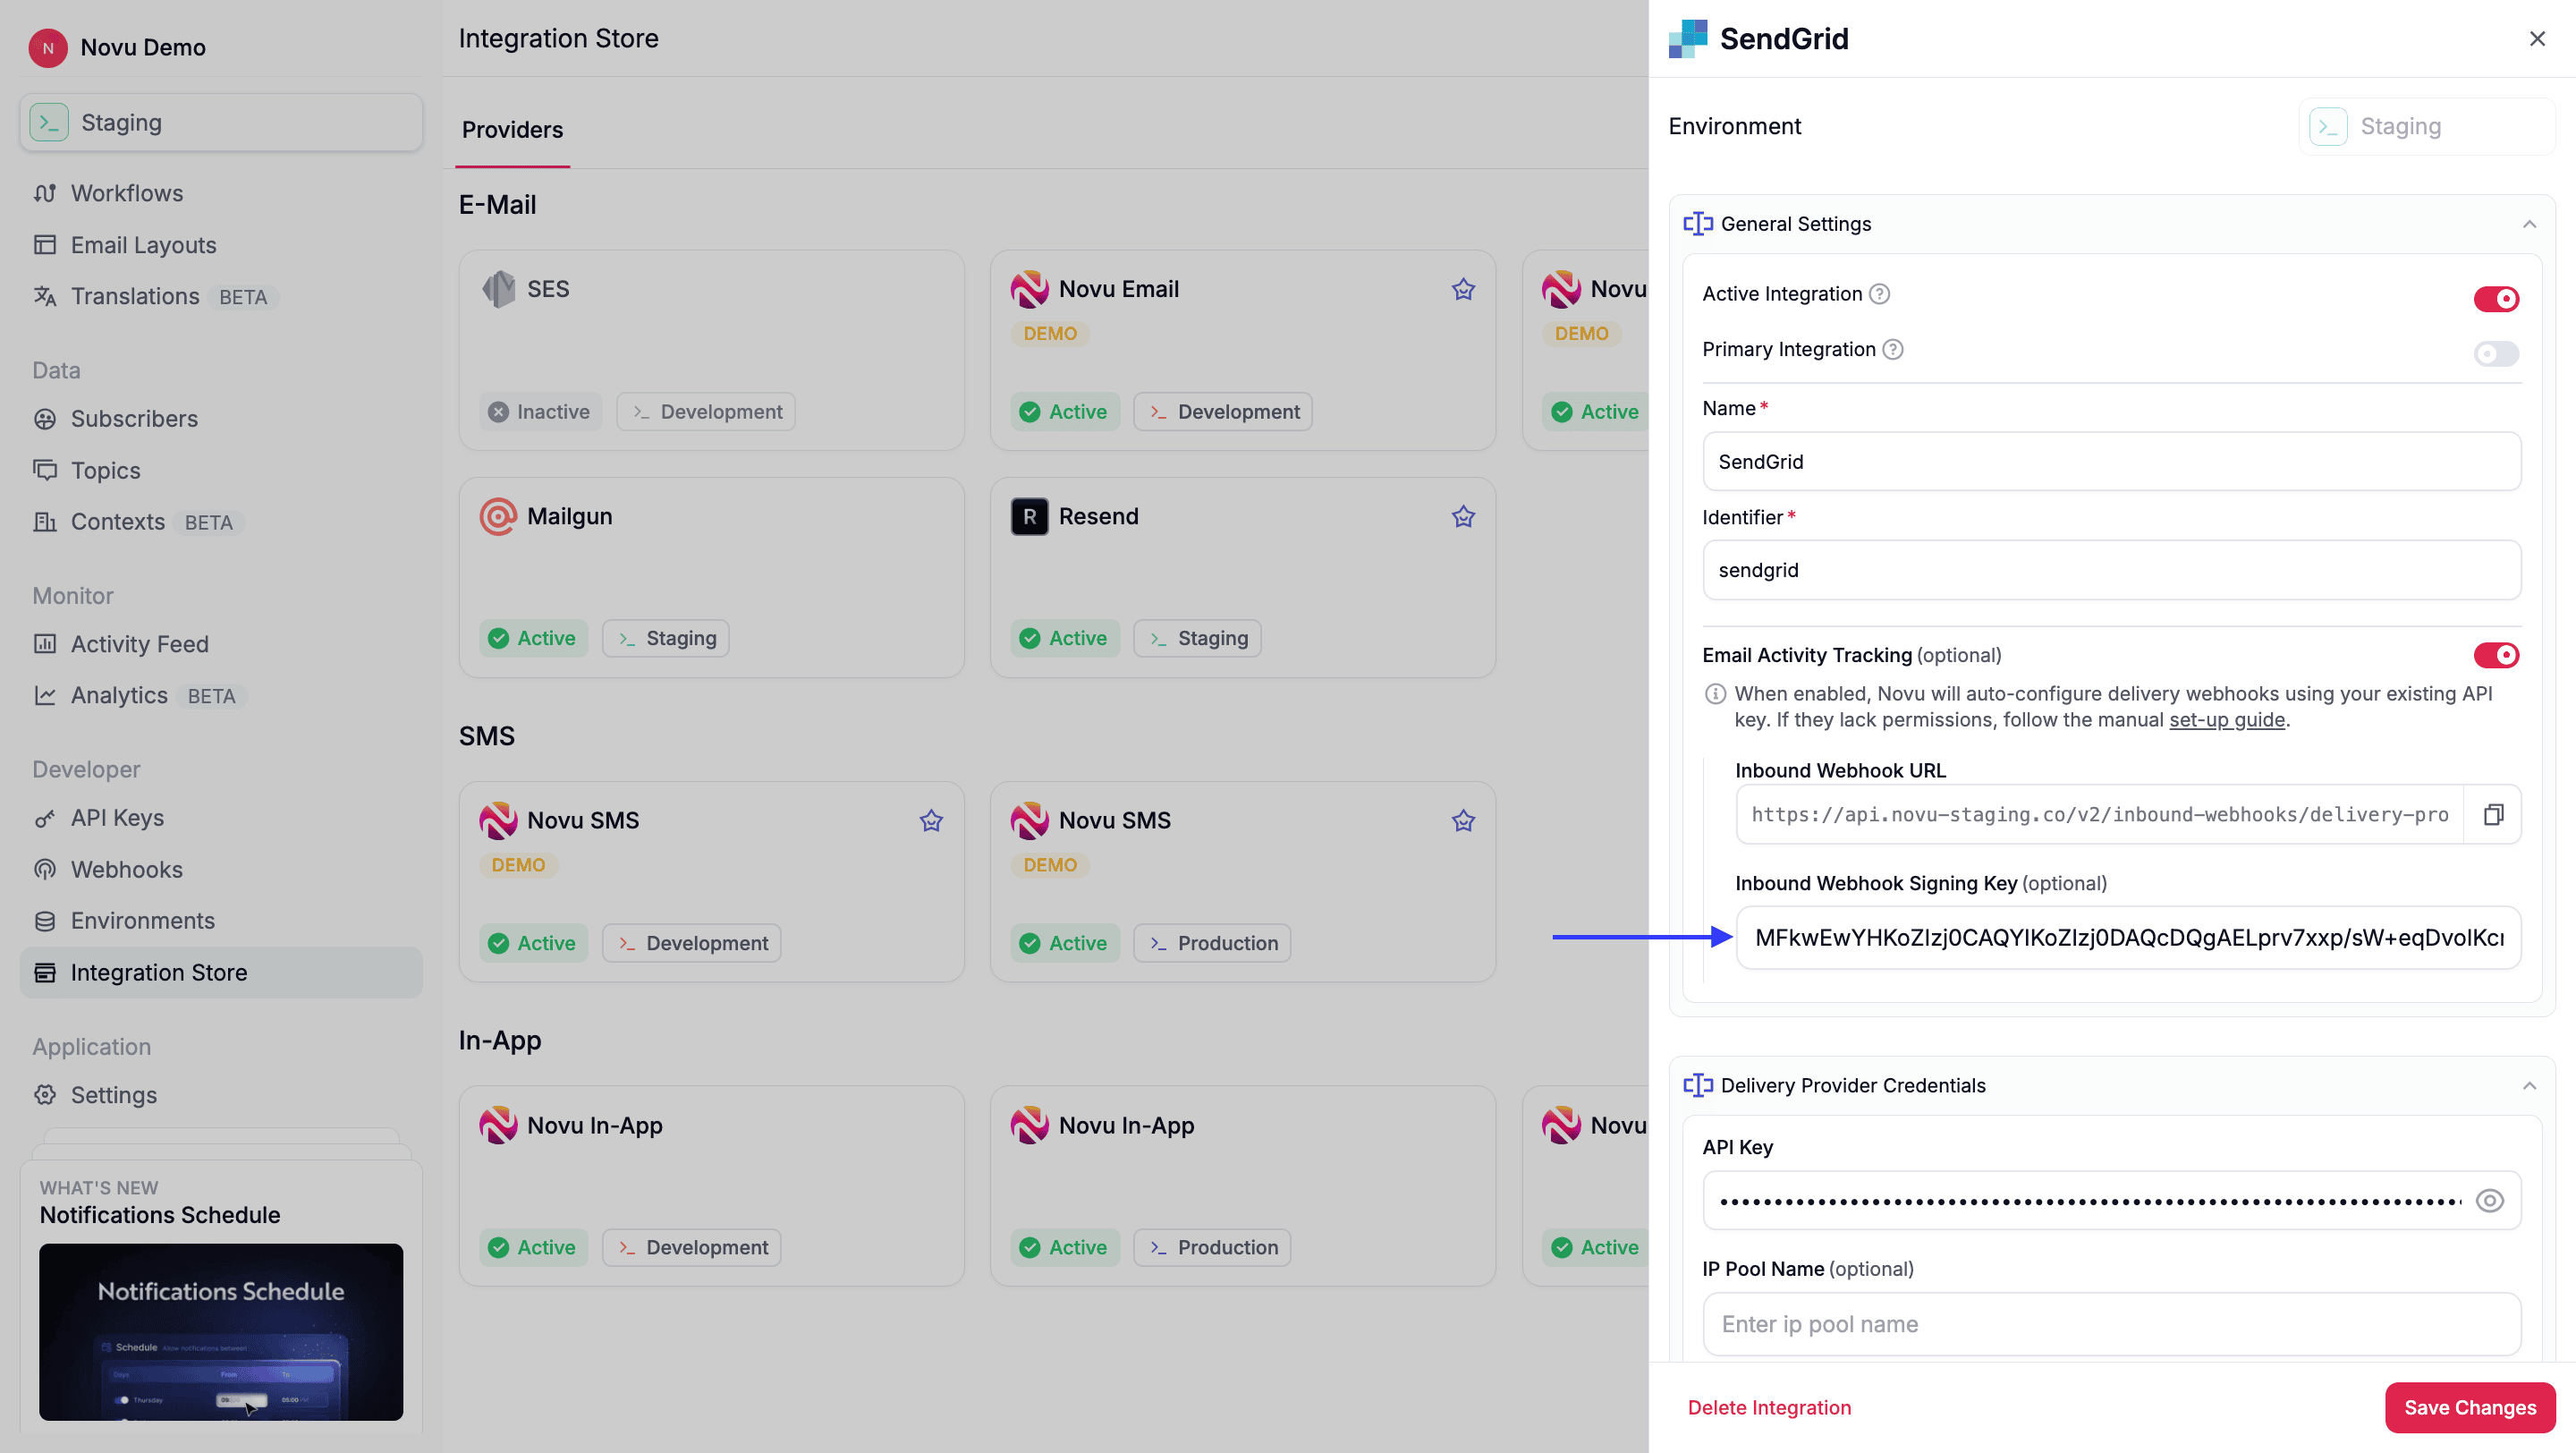
- Click the Email Activity Tracking toggle to enable it.
Step 3: Manual configuration (only if auto-configuration fails)
If the automatic configuration fails for any reason, or if you prefer to set it up manually, follow these steps.Part 1: Configure the webhook in SendGrid
- In your Novu SendGrid integration settings, enable the Email Activity Tracking toggle to reveal the Inbound Webhook URL
- Copy the this Inbound Webhook URL.
- Log in to the SendGrid dashboard.
- Go to the Settings page, and click Mail Settings.
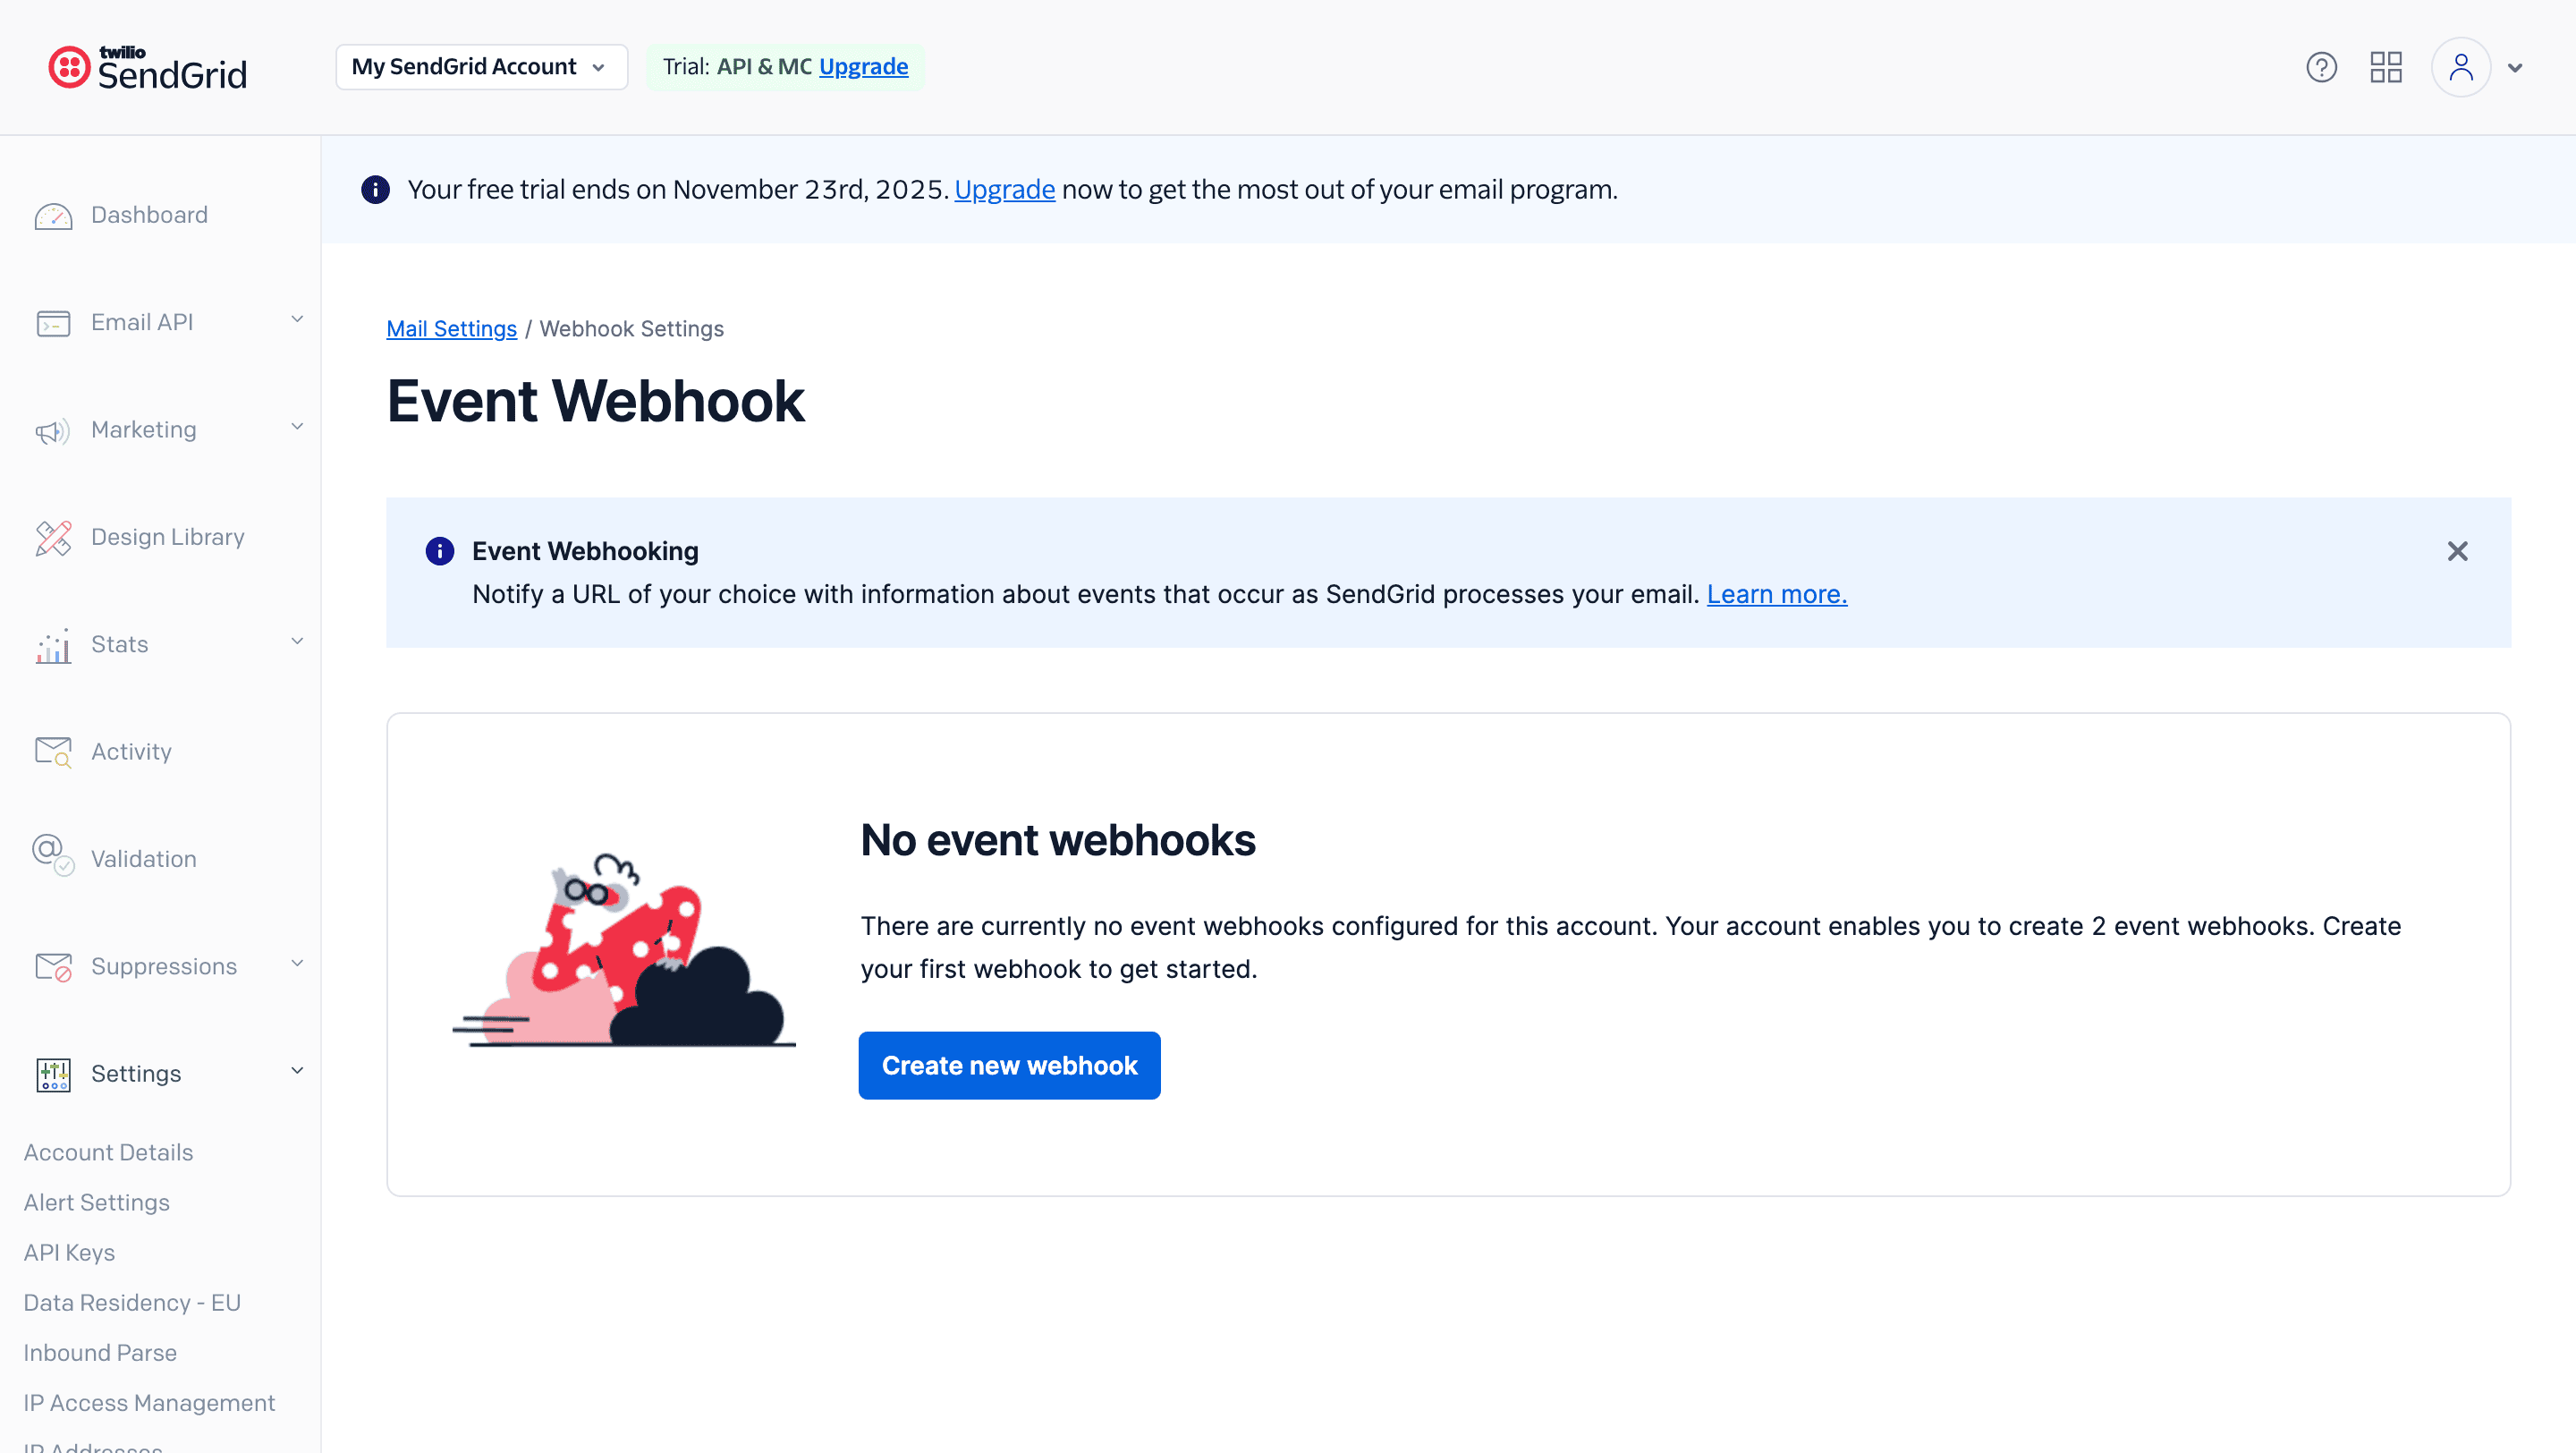
- Click on Event Webhook.
- Click Create new webhook
- Give the webhook a friendly name.
- Paste the Inbound Webhook URL copied from Novu into the Post URL field.
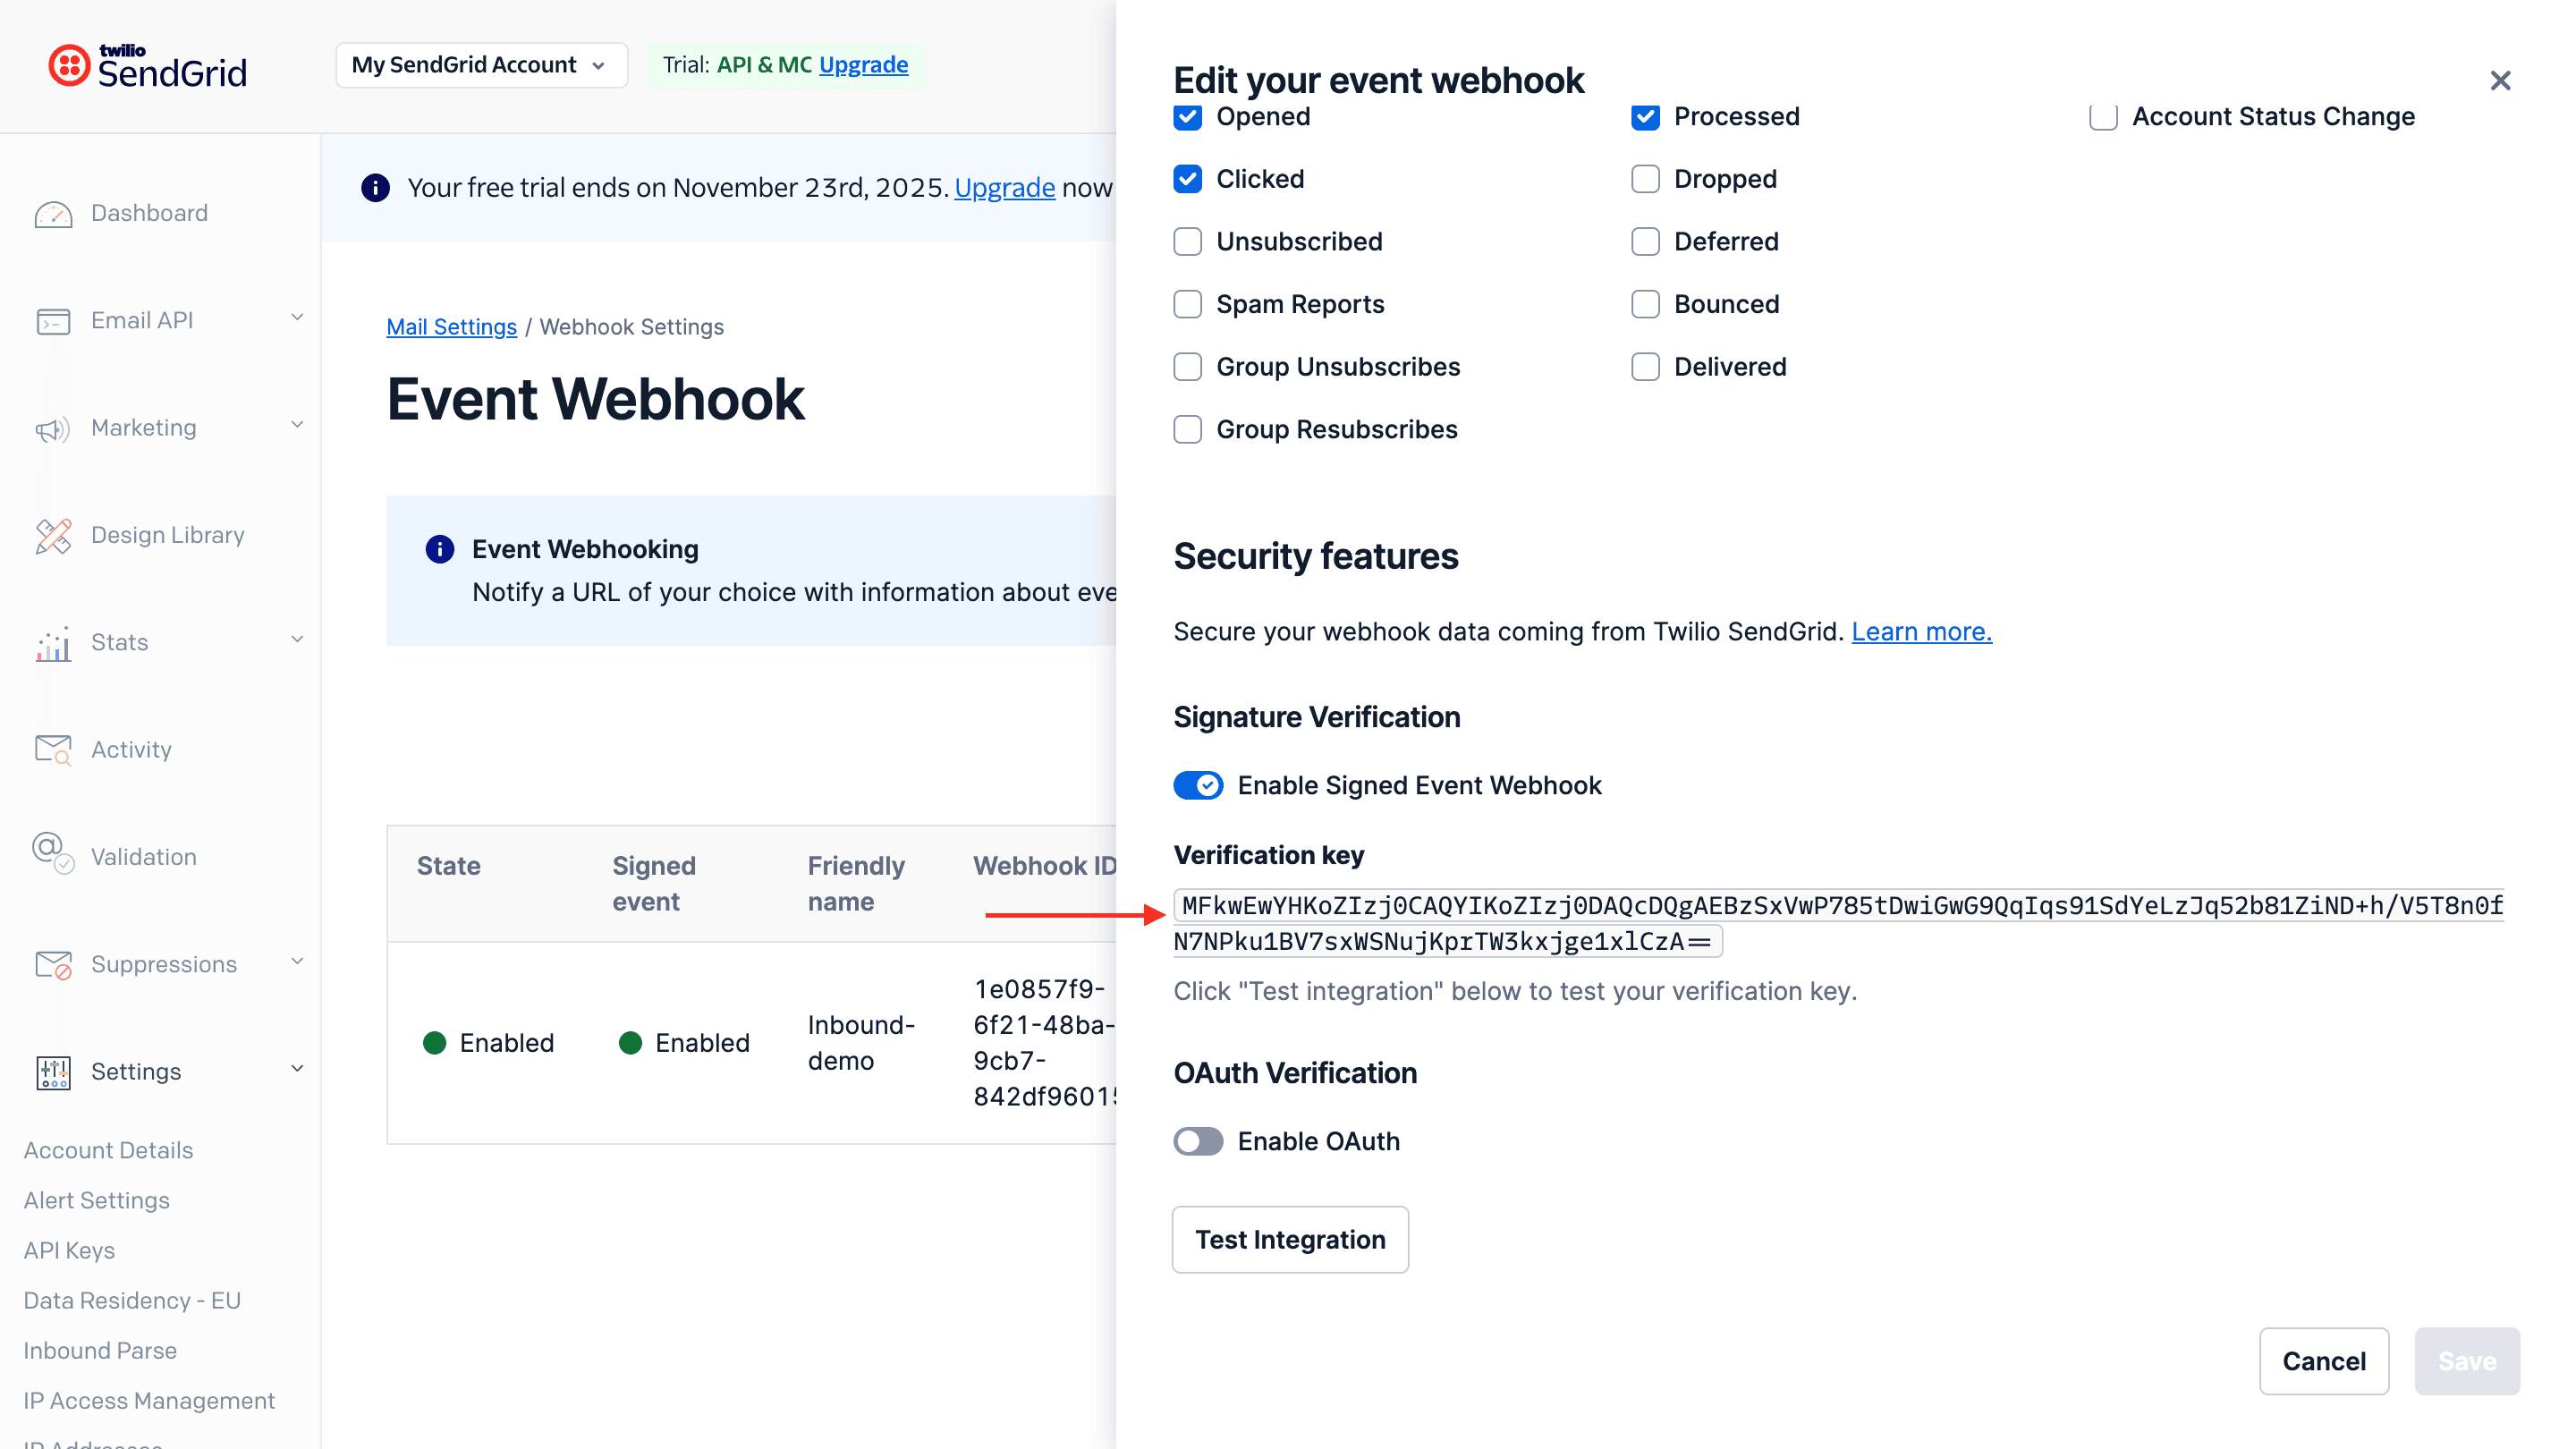
- Under Actions to be posted, select the events Novu supports that you want to track
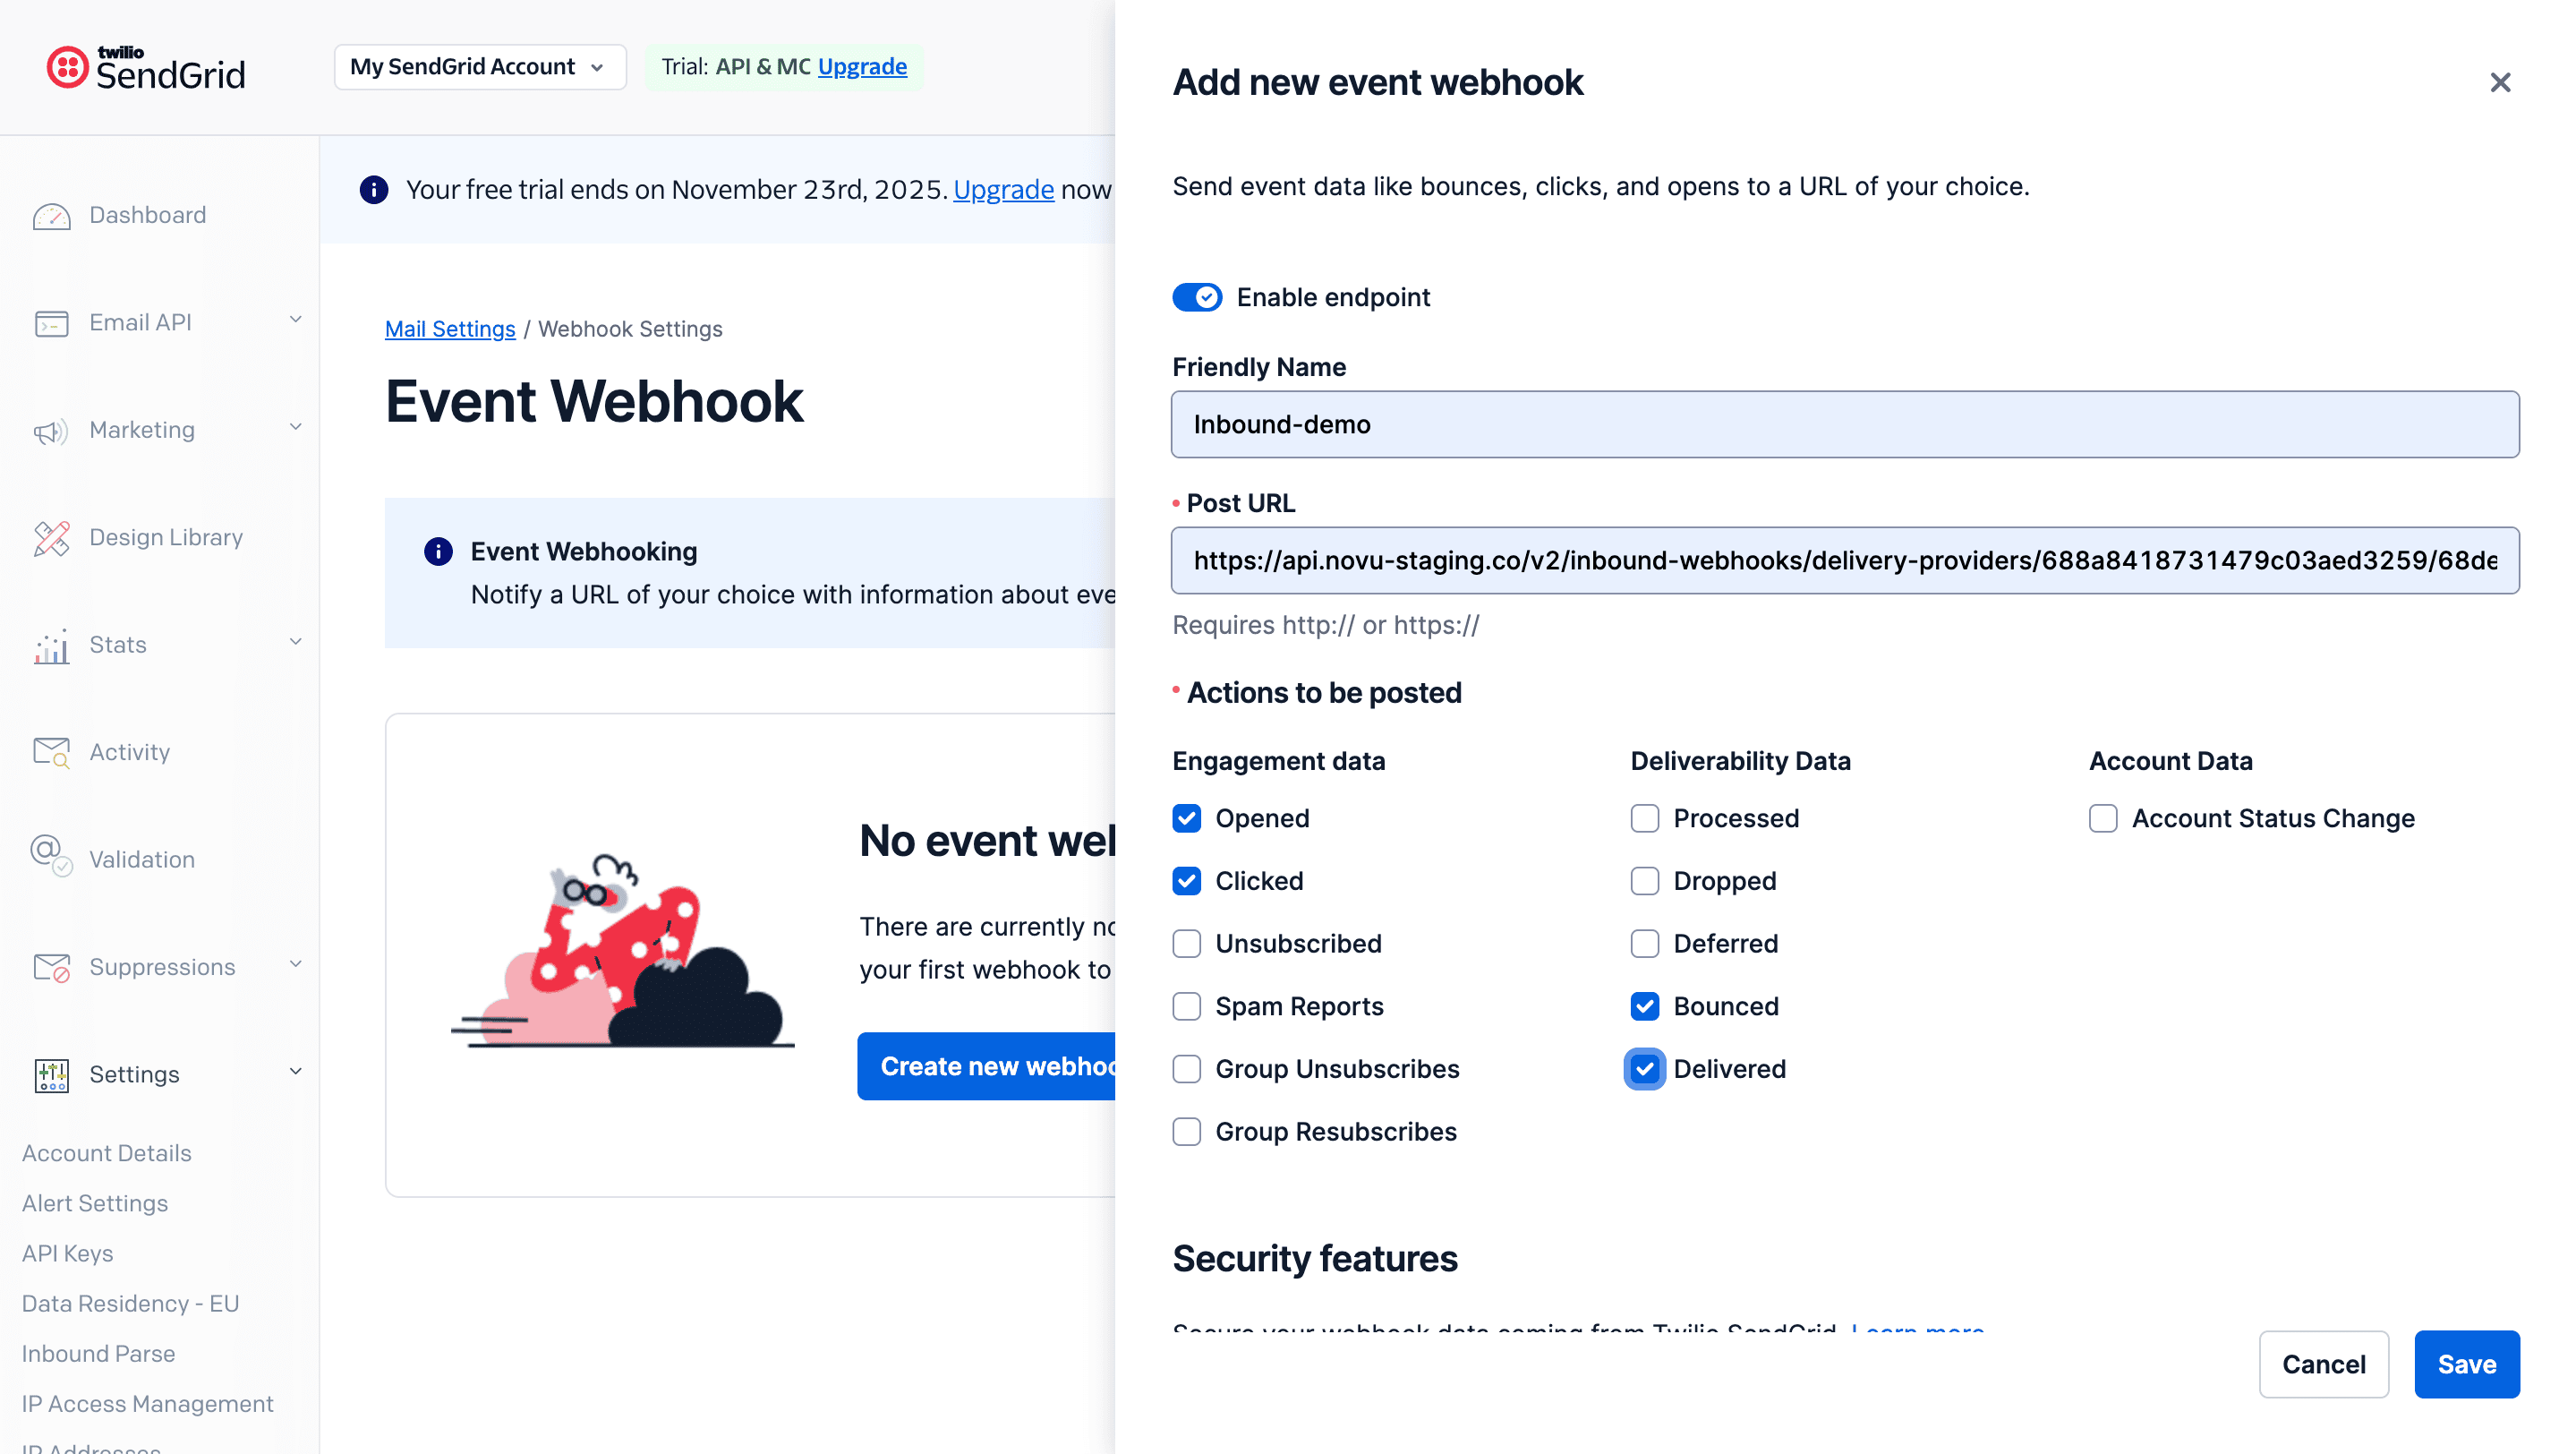
- Under Singnature Verification, enable Enable Signed Event Webhook
- Click Save
Part 2: Add the signing key to Novu (Recommended)
For enhanced security, you should add a signing key to verify that webhooks are coming from SendGrid.- Log in to the SendGrid dashboard.
- Go to the Settings page, and click Mail Settings.
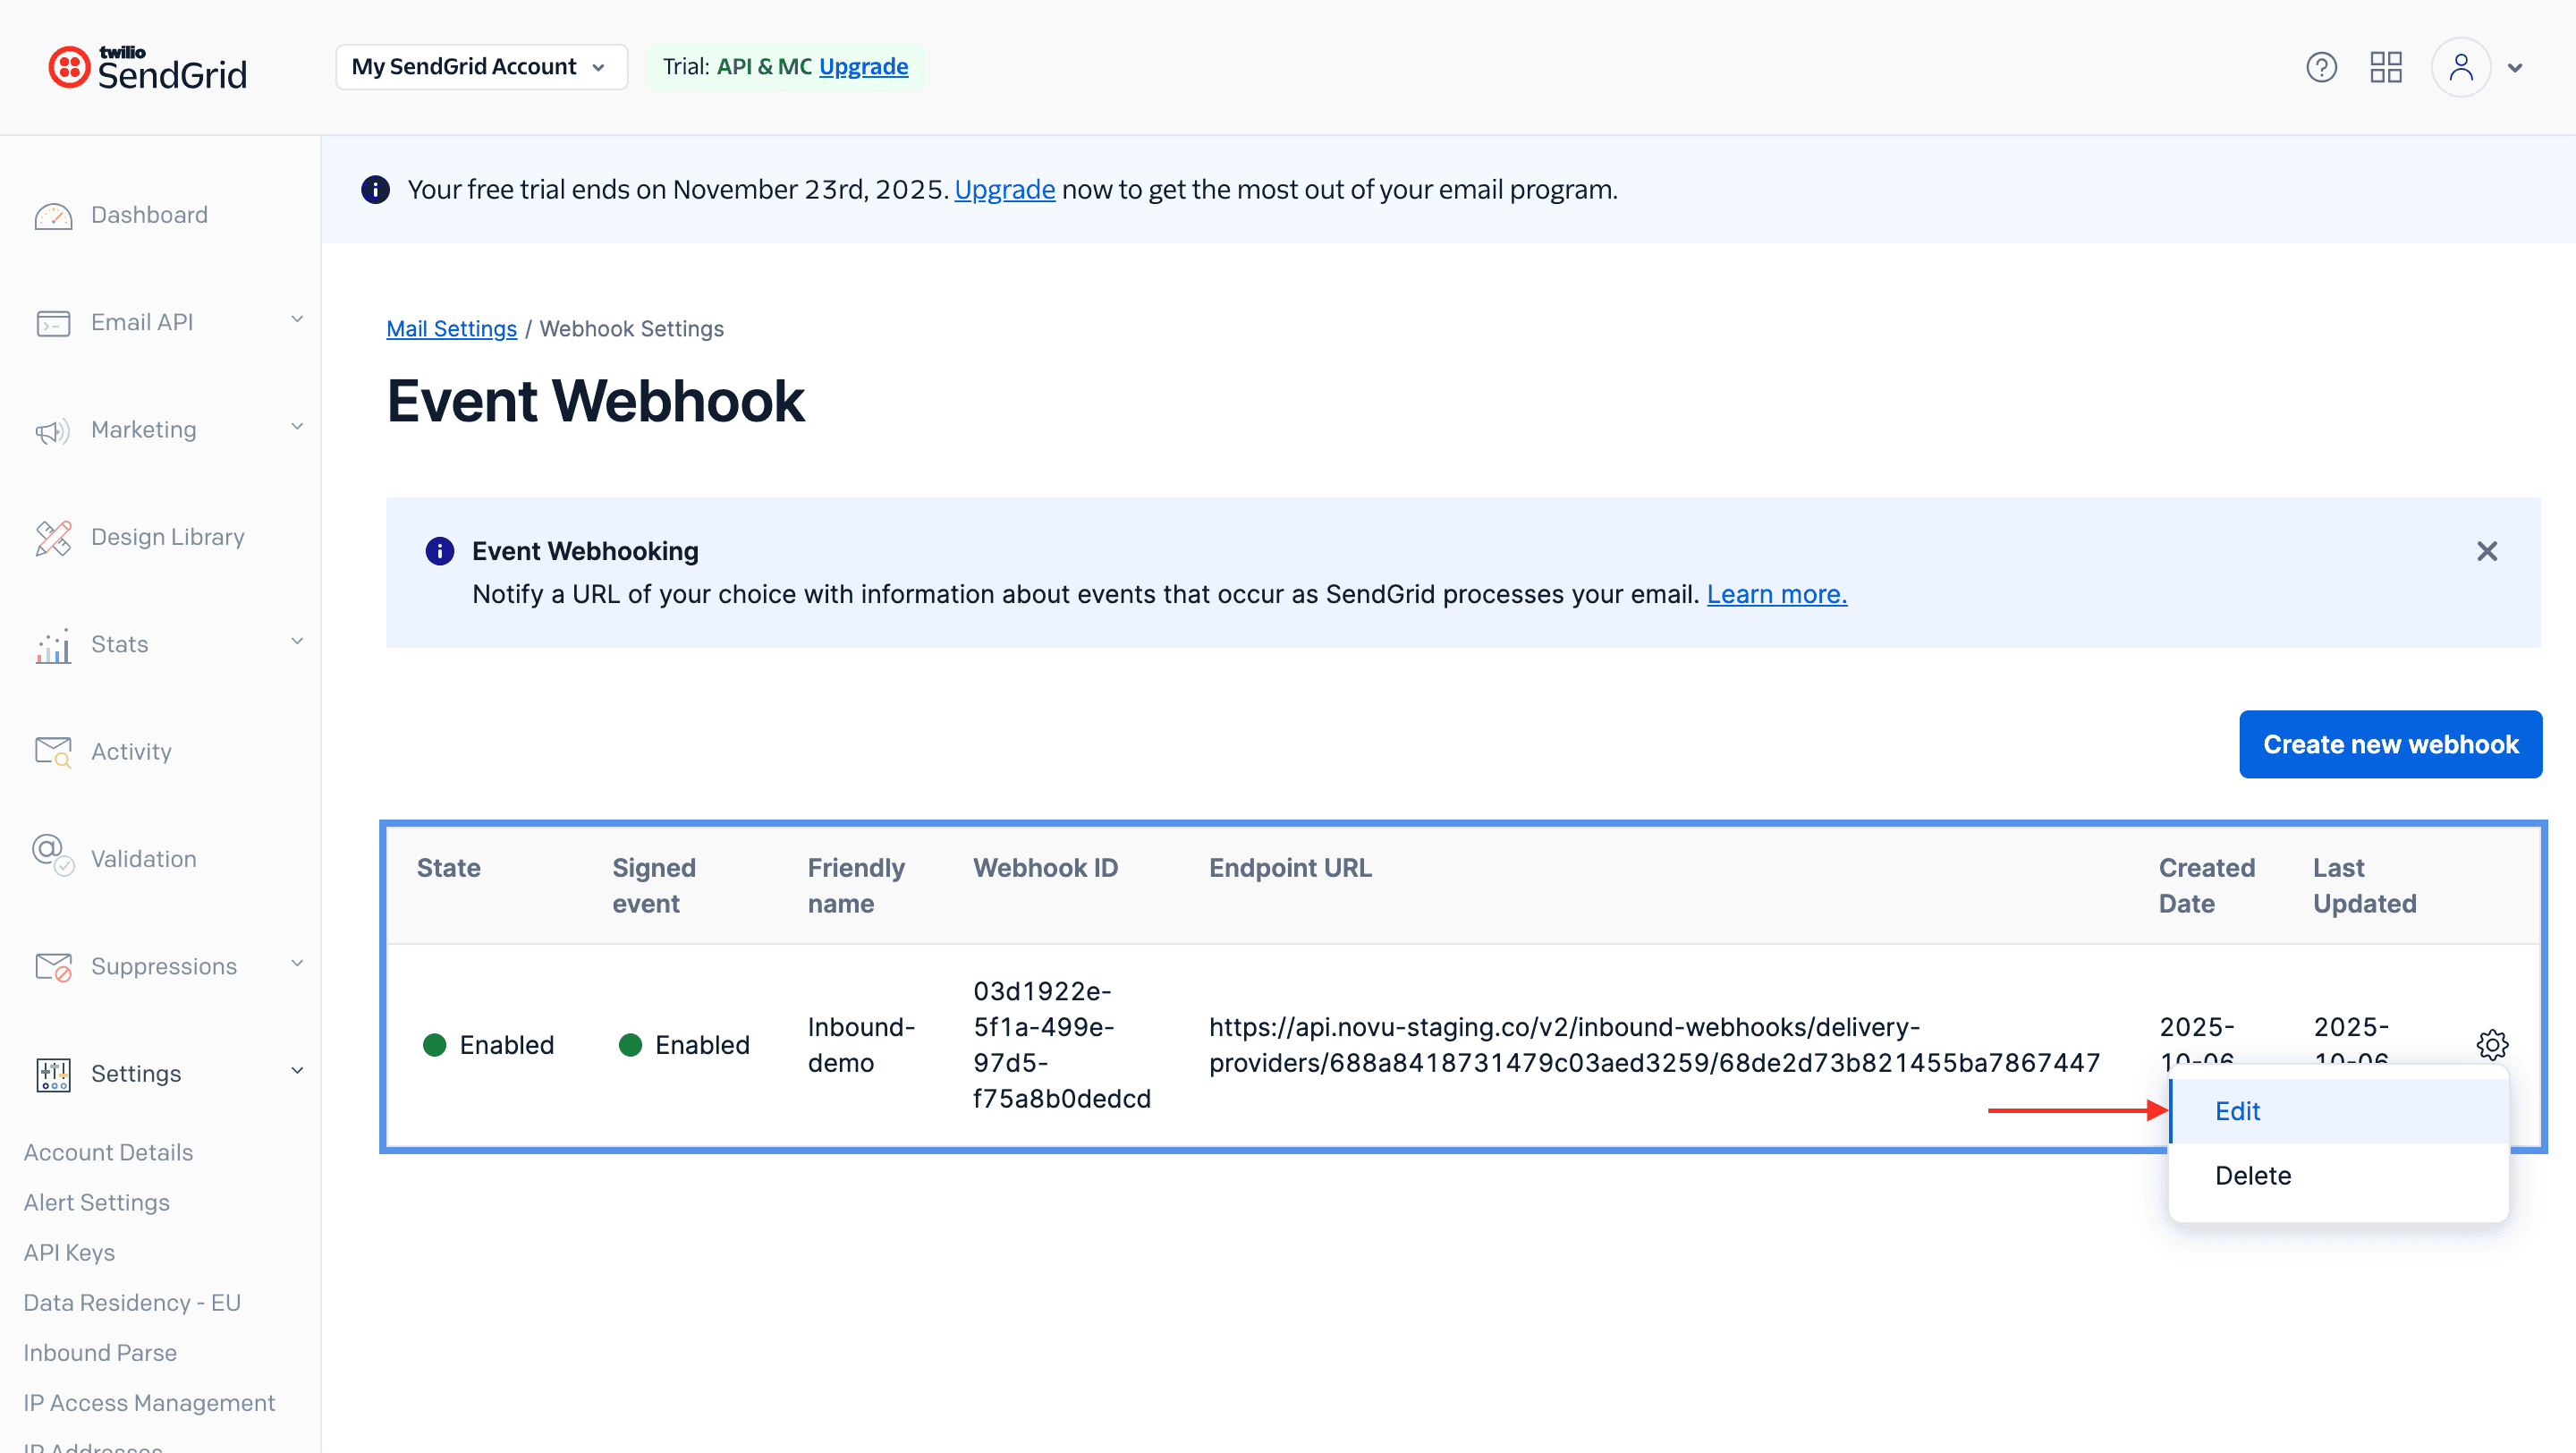
- Click the settings icon next to the webhhok a menu will appear.
- Click Edit.
- Enable Signed Webhook Verification if is hasn’t been enabled. A Verification Key will be displayed.
- Copy the verification key.
- Return to your Novu SendGrid integration settings.
- Paste the key you just copied from SendGrid into the Inbound Webhook Signing Key field.
- Click Save.